Blog
A random collection of thoughts on a variety of topics
(27 Posts)
“Bloom Filters in the wild”
2020-10-15
At my job, it's not too often I have a use for "exotic" data structures. Most of the time, a simple HashMap, Set, or List (vector) will do the job. However recently we had a situation come up where we got to apply a Bloom Filter to solve our problem. If your unfamiliar with Bloom Filters, they are a space optimized, probabilistic set data structure. They have a neat property where they can tell you that something is probably in a set, or definitely not in a set. So basically, they are a great if you don't care about false positives, but must always have true negatives. They are also a good choice if you have limited space, or want to know exactly how much space your using because they don't grow or shrink no matter how much data you "store" in them. However, the downside is that the more data you store, more more likely a false positive will occur. In our case, we could not store the full data set in memory, so a Bloom Filter was a perfect fit.
Bloom filters are a very simple data structure. They are simple an array of bits (bitmap). These bits get set as you add data to the filter. When you add new data to the filter, the data is run through a hash function, and that hash function is used to select the index of the bit to flip to true. Normally you use a few hashes, or different parts of the same hash to set a few bits per piece of data. Ideally, your hash produces values in a nice uniform distribution. Lets take a look at an example.

In this example, I use the Murmur2 hash 4 times with 4 different seed values. The output of the Murmur2 hash is a 32 bit unsigned number. I can then take this number and use the modulus to get an index. Now if I wanted to check if an item was in the set, I would just do the exact same hashing and get the same indexes, and then verify that those indexes are all 1's. If there are any 0's then this item was definitely never added to the set.

Now, it should be clear why this data structure has false positives. It's because you only have a limited set of hashes to map values into, so there can be collisions. Lets say for example that I have added "Hello" into the filter, and it happens to map to bits 1, 2, 3 and 4. Later I check if the word "Boston" is in the set, and it also happens to map to bits 1, 2, 3 and 4. Now I have a false positive. However, the larger we make the bit map, and the more uniform the output of the hash function is, the less likely we get a collision. It should also be clear why you don't get false negatives. If any of the indexes are false, or 0, then the whole thing is false.
Now that we understand how a Bloom Filter works, let's go ahead and implement one of our own. For this project I will be using C++. I will make all of the code available on my GitHub.
  class IBloomFilter {
    public :
    virtual void add(const std::string& s) = 0;
    virtual bool contains(const std::string& s) const = 0;
    virtual void clear() = 0;
    virtual double getProbabilityOfFalsePositive() const = 0;
    virtual unsigned int getCount() const = 0;
    virtual unsigned long int getBitCount() const = 0;

    protected :
    virtual ~IBloomFilter(){};
  };
Here is the interface that I created that defines what a Bloom Filter can do at a high level. Notice that there is no remove() function. This is because the same thing that can cause a false positive, can also cause multiple removals. Using the above example, if I tried to remove "Boston" I would also remove "Hello" and every other word that even partially maps to that sequence of bits.
I decided to code up the Bloom Filter in two different ways. A fixed size Bloom Filter where you specify the number of bits you want in the bitmap, and a dynamic Bloom Filter where you specify the number of elements you want to store, along with a worst case probability of false positives. Given this data it will generate a bit array of the proper size. First, lets take a look at the header for the FixedBloomFilter.
template <std::size_t N>
class FixedBloomFilter : public IBloomFilter {
  std::unique_ptr<std::bitset<N>> bitmap;
  unsigned long int m;
  unsigned int c;
  unsigned int k;
  std::vector<uint32_t> seeds;

  public :
  FixedBloomFilter();
  void add(const std::string& s);
  bool contains(const std::string& s) const;
  void clear();
  double getProbabilityOfFalsePositive() const;
  unsigned int getCount() const;
  unsigned long int getBitCount() const;
};
For the fixed size filter, I decided to use the std::bitset, as it is the ideal structure to store bits in. Next I define a few needed values. m is the number of bits, c is the current count of elements stored in the filter, k is the number of hashes I run on each entry, and seeds will hold the seeds for those hashes so each hash produces a different result. For the FixedBloomFilter we know these values, so we don't need to calculate them, but in the DynamicBloomFilter we will calculate these on the fly.
For both Bloom Filters, we will still calculate the error probability the same way using the following equation.
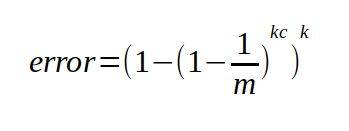
This will give us the worst case probably of getting a false positive. I say worst case because I found that in practice the real chance of false positives to be lower, sometimes by half or more. I suspect because there are certain "non-sane" value that will never be checked. For example, if my Bloom Filter is holding English words, and I want to compare the words in two books, chances are I will never check for gibberish words like "hvieioe", however this equation still accounts for that.
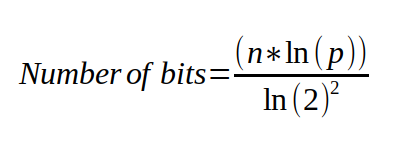
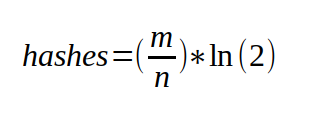
Now, for the DynamicBloomFilter I take into the constructor the maximum number of elements I expect the filter to hold, and the desired worst case probability that I want. Using those values, I can calculate the exact number of bits, and the number of hashes that I will need to fulfill these requirements.
class DynamicBloomFilter : public IBloomFilter {
  unsigned long m;
  unsigned int n;
  double p;
  unsigned int c;
  std::vector<bool> bitmap;
  std::vector<uint32_t> seeds;

  public :
  explicit DynamicBloomFilter(unsigned int n, double desired_p);
  void add(const std::string& s);
  bool contains(const std::string& s) const;
  void clear();
  double getProbabilityOfFalsePositive() const;
  unsigned int getCount() const;
  unsigned long int getBitCount() const;
};
To see the details of the implementation, check out my source code repo on github. For brevity, I'm just going to show the add and contains code here so you can see the implementation.
void DynamicBloomFilter::add(const std::string& s) {
  const void* ptr = reinterpret_cast<const void*>(s.data());

  std::for_each(seeds.begin(), seeds.end(), [=, this](const uint32_t& seed) {
      uint32_t h = MurmurHash2(ptr, s.size(), seed);
      bitmap[h%m] = true;
  });

  c++;
}

bool DynamicBloomFilter::contains(const std::string& s) const {
  const void* ptr = reinterpret_cast<const void*>(s.data());

  return std::all_of(seeds.begin(), seeds.end(), [=, this](const uint32_t& seed) {
      uint32_t h = MurmurHash2(ptr, s.size(), seed);
      return bitmap[h%m];
  });
}
This code should look just like the picture that I showed above. For both adding and checking we hash the input value using the MurmurHash2() function. The only difference is that when adding, we set those bits to true (or 1), and when checking we just check that they are all true (or 1's).
Now that we have our two versions of the Bloom Filter, how do they perform? First lets take a look at the dynamic filter. This filter takes in two parameters, the expected number of elements to be stored in the filter, and the desired probability to a false positive. For my example, I am using the /usr/share/dict/cracklib-small, which is a small dictionary file containing 52,875 english words. My verification set is /usr/share/dict/american-english, which is a larger dictionary containing 102,305 words. When I create my new DynamicBloomFilter I set the max expected values to be 52875 and the desired error probability to be 0.01. Here are the results.
BloomFilter is 61.8663 K bytes
Bloom Filter loaded with 52876 words
Error probability: 0.0101441
Bloom Filter matched verification set 99.3783%
Actual Error Probability: 0.00621664
As you can see, the DynamicBloomFilter was able to take in our parameters and create the optimal filter size, and hash count to achieve our desired probability. It was able to do it in just under 62K of memory. Keep in mind that my actual data set was 468K. So that is a 7.5X reduction in size, with 99.4% accuracy. Not too bad.
For the FixedBloomFilter we can get similar results as long as we use the correct size for the bitmap. Using the smallest size FixedSize::TINY, we only get an 8KB filter, and a terrible 76.98% accuracy on our test set. However once we jump up one level to the FixedSize::SMALL, now we have a 128KB filter, with 99.9% accuracy. However, compared to the Dynamic filter, we are double the size and don't gain much accuracy. Something to consider when choosing your implementation.
BloomFilter is 128 K bytes
Bloom Filter loaded with 52876 words
Error probability: 0.00111332
Bloom Filter matched verification set 99.9365%
Actual Error Probability: 0.000635349
The DynamicBloomFilter is better when you know the size of the set your going to load into it, and just want to control for the error probability. The FixedBloomFilter is great when you have space constraints, or you don't know how much data your going to load, but just want to have a probabilistic way to knowing if you have "seen this before" (like for caching schemes). Both have their pros and cons, so I leave it to you to decide which way works better for your application. Ultimately in our application, we just chose a very large filter, we didn't know the upper limit of items we were going to add, and because even a few hundred megabytes was still gigabytes smaller then our actual data set.
“Website Reboot”
2020-09-26
Well, I would ask where the last 5 years went, but she is running around with a crown on pretending to freeze me because she just watched Frozen 2. However, I have decided to make the time to refresh my website, finally add SSL, update the stack it runs on, and change how I manage my blog. Overall I think this new, cleaner look is refreshing, and improves the aesthetics. One nice feature of my new stack is that now I can blog directly on my server, and not need to go to Tumblr. I can also iterate faster then with my old stack, which was built on Ruby.
Looking back at my analytics data, my most viewed blog posts have been my "teaching" posts. Specifically, my post on UDP has been my biggest hit. Given this my goal moving forward will be to do more posts on the subject of networking, threading, and other "complicated" topics. I really enjoy making posts like this because it has the fantastic side effect of showing me where my own knowledge is lacking. Many times I sit down to write a post and I realize that I only have a rudimentary idea of what I am trying to show. Usually I have learned enough about something in order to use it effectively in my job, but not necessary well enough to teach it to someone else. By forcing myself to teach it to someone else, I also fill in the gaps in my own knowledge and become a more well rounded engineer as a result.
During my hiatus from my website I was able to complete another video course for Packt publishing called C++ Standard Template Library in Practice. In it I cover the fundamentals and usage of the standard library, with a focus on things added in C++11, 14 and 17. I even give a C++20 preview. If your interested in learning how to use the standard library to make your C++ programs more concise, I recommend this course. It is also available on Udemy as well.
Last time I posted, I mentioned that I was heavily involved in Brazilian Jiu Jitsu, which is still very true to this day. In fact I started a club at my company, and it was even featured in a video. You can check it out on Youtube here.
Well, that's all for my update for now. I'm going to get to work on my next technical blog and see where that takes me. Hopefully I will get some posts out before my schedule becomes too crazy again. Thanks for checking out my new site!
“Where have you been?”
2015-08-01
It is hard to believe how quickly times flies! It has been over a year since I posted any updates to my blog, but I have been so busy it feels like yesterday that I was talking about Dart UDP support.
Well, first and foremost, I have competed my first video course with PACKT Publishing, It’s called Introducing Dart, and is a rapid paced tour of the Dart client side programming language features. It was written and designed to be used by people who may be familiar with other languages, but want to get up to speed on Dart ASAP. If you are interested in checking it out, it can be found here at the PACKT website.
I think these videos are a great learning tool because of the rapid no-nonsense nature of instruction. I don’t waste time with trivial details, and every little piece of syntax. We simply work together on creating a browser based game, and get things working step by step. Honestly, anyone can learn the syntax quickly enough by looking at the tutorial on the Dart homepage. But learning how to express your ideas with the language is a different challenge that I hope I can help you overcome.
Okay, so enough self promotion of now, in other news I have also been getting deeply involved in Jiu-Jitsu and submission wrestling. Besides the fact it is great exercise, it is just a super fun activity to do, and a great set of skills to learn. I like to think of it as the thinking mans fighting. It’s like playing chess, but the chess pieces are your limbs and neck.
Going forward I hope to keep up with this better, and make some more tutorials and such. I seem to be getting good at this whole Dart thing, so maybe I will continue with that.
So far I have covered a variety of sockets that are supported by Dart. Just recently the Dart developers added the ability to use UDP sockets to the dart:io library. So for this installment I will cover how to use Dart to send and receive data over UDP. I will start with an explanation of how UDP works, then move on to specific client and server examples in Dart. I will also present UDP multicasting in Dart, and cover some gotchas that come up when trying to work with it.
What is UDP?
UDP is the User Datagram Protocol. It is different from TCP (Transmission Control Protocol) in that it does not establish a connection to the destination. UDP is designed to send datagrams. Datagrams can be though of as discrete blocks of data or messages with limited overhead. UDP does not guarantee that the datagrams will be delivered in any specific order or even at all! So you might be asking, “Why do we use them if they are not guaranteed to arrive at their destination?”. Good question! They are very useful for certain types of data that does not need 100% reliability, and therefore it does not need the overhead that TCP imposes.
So what kind of data does not need to be reliably delivered? Say you are running a server that receives weather updates from hundreds of weather stations across the country once every second. That’s a lot of data, but more importantly each new message from a single weather station makes the previous message obsolete. In this case if we loose a few messages it’s not a big deal.
Other kinds of services that are transmitted over UDP are streaming video, voice over IP phone calls, DHCP, and multi-player online games.
Close look at a UDP Datagram
A user datagram has a fixed 8 byte header. The header is very simple and contains four, 16 bit fields. The fields are the source port, destination port, total length, and a checksum. Let’s take a look at it as a C struct.
#include <stdint.h>

typedef struct {
   uint16_t sourcePort;
   uint16_t destPort;
   uint16_t length;
   uint16_t checksum;
} UDPHeader_t;
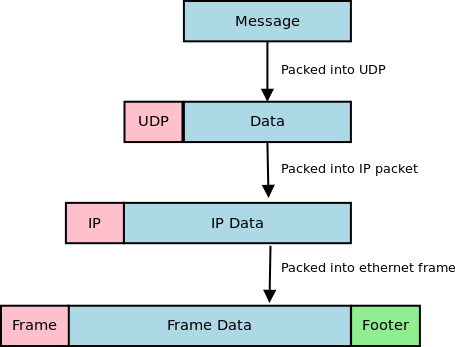
Now you can see how simple the UDP header really is. There is not much too it. Before the datagram is sent out it is first encapsulated into an IP packet. The IP packet has its protocol field set to 17 (0x11) to indicate that it is carrying a UDP packet. The IP header contains the source and destination addresses. The structure of an IPv4 IP header can be found here at Wikipedia.
Finally this IP packet will be encapsulated into an Ethernet frame. Since most routing equipment uses a 1500 byte MTU (Maximum transmission unit), a data payload that is sent using UDP should be kept at or below 1432 bytes (IP headers can be up to 60 bytes, and the UDP header is always 8 bytes).
On a side note, if your interested in more details about TCP/IP and the protocols that keep networks and the internet running, I recommend you check out TCP/IP Protocol Suite by Behrouz A. Forouzan. It contains a lot of detailed information about a ton of different protocols.
UDP Receiver (client) Example
Alright, now that we know how UDP works, let’s check out how to set up a UDP client to start receiving UDP packets. To get started we are going to use the RawDatagramSocket class in dart:io. One thing that should jump out at you as we go through these examples is that it doesn’t matter whether you are sending or receiving datagrams, you must still bind the socket. This is because datagram sockets are connectionless. Every sender is also a receiver by default and can receive messages. All of the below examples are tested against Dart 1.1.3.
import 'dart:io';

void main(List<String> args){
  RawDatagramSocket.bind(InternetAddress.ANY_IP_V4, 4444).then((RawDatagramSocket socket){
    print('Datagram socket ready to receive');
    print('${socket.address.address}:${socket.port}');
    socket.listen((RawSocketEvent e){
      Datagram d = socket.receive();
      if (d == null) return;

      String message = new String.fromCharCodes(d.data).trim();
      print('Datagram from ${d.address.address}:${d.port}: ${message}');
    });
  });
}
We start out by calling the RawDatagramSocket.bind() method to bind the socket to port 4444 on any available IPv4 Ethernet devices. This returns a Future<RawDatagramSocket>. Once the socket has been bound we can listen for any incoming datagram packets by registering an onData callback using the RawDatagramSocket.listen() method. One thing to note is that the onData callback gives us a RawSocketEvent object. To receive the actual datagram we must call RawDatagramSocket.receive() inside of the onData callback. The receive method will return null if there are no datagrams available so make sure you check for that state. The Datagram object returned by the receive() method contains the InternetAddress object with the details of the sender, and the data that was sent as a List<int>.
To test this application fire it up with Dart, and use netcat to send it some test packets.
## in terminal 1
$ dart udp_receive.dart
Datagram socket ready to receive
0.0.0.0:4444
Datagram from 127.0.0.1:42811: Hello!
Datagram from 127.0.0.1:42811: How are you doing?
Datagram from 127.0.0.1:42811: This is receiving UDP packets!

## in terminal 2
$ nc localhost 4444 -u
Hello!
How are you doing?
This is receiving UDP packets!
UDP Sender (server) Example
To create a program that sends datagrams, we basically do the same thing as before. We need to bind() the socket, then call the RawDatagramSocket.send(List<int> buffer, InternetAddress address, int port) method. The send method does not take a Datagram object like you might expect, instead the send() method takes the destination address and port directly. The address and port parameters tell the datagram where to go. Remember that this is a connectionless protocol so each time we want to send data we need to provide a destination.
import 'dart:io';

void main(List<String> args){
  RawDatagramSocket.bind(InternetAddress.ANY_IP_V4, 0).then((RawDatagramSocket socket){
    print('Sending from ${socket.address.address}:${socket.port}');
    int port = 4444;
    socket.send('Hello from UDP land!\n'.codeUnits,
      InternetAddress.LOOPBACK_IP_V4, port);
  });
}
Notice that the bind() method call takes 0 as the port number. This tells Dart that we don’t care what port we use to send the datagram, just pick the next one that is available. Also take note that I am setting the destination to InternetAddress.LOOPBACK_IP_V4. This causes the datagram to be sent to localhost. To test this out we can fire up the udp_receive.dart program from before and then run this program.
## Terminal 1
$ dart udp_receive.dart
Datagram socket read to receive
0.0.0.0:4444
Datagram from 127.0.0.1:33083: Hello from UDP land!

## Terminal 2
$ dart udp_send.dart
Sending from 0.0.0.0:33083
UDP can send and receive together
Since UDP is a connectionless protocol, a single UDP socket can be used to send and receive data. The bind() call establishes what port and address we can receive data on, and the send() call allows us to send data to anywhere we want. We can easily make a UDP echo server by combining the two.
import 'dart:io';

void main(List<String> args){
  RawDatagramSocket.bind(InternetAddress.ANY_IP_V4, 4444).then((RawDatagramSocket socket){
    print('UDP Echo ready to receive');
    print('${socket.address.address}:${socket.port}');
    socket.listen((RawSocketEvent e){
      Datagram d = socket.receive();
      if (d == null) return;

      String message = new String.fromCharCodes(d.data);
      print('Datagram from ${d.address.address}:${d.port}: ${message.trim()}');

      socket.send(message.codeUnits, d.address, d.port);
    });
  });
}
In the above example, each time a Datagram is received, it is echoed back to the sender. The Datagram object carries the source InternetAddress, and source port that we can use in the send() method to return the message.
## Terminal 1
$ dart udp_echo.dart
UDP Echo ready to receive
0.0.0.0:4444
Datagram from 127.0.0.1:57194: Now are are getting an echo
Datagram from 127.0.0.1:57194: much more interesting!

## Terminal 2
$ netcat 127.0.0.1 4444 -u
Now are are getting an echo
Now are are getting an echo
much more interesting!
much more interesting!
Multicast
These Dart programs presented above all perform unicasting. Unicasting is a one-to-one transmission of data. There is a single source and a single destination. However using UDP sockets, we can also take advantage of multicasting. Multicasting opens us up to have a single source and multiple destinations. This is very convenient for certain applications like streaming media. The source program send datagram packets to a multicast group address. Each interested client then joins the multicast group and can receive the datagrams being sent.
The source that is sending the multicast datagrams has an easy time, all that is necessary is to send the packets to a multicast group address instead of a normal destination address. Multicast addresses are in the range of 224.0.0.0/4. That is all IP address from 224.0.0.0 to 239.255.255.255.
/*
   Multicast UDP broadcaster
   multicast_send.dart
*/
import 'dart:io';
import 'dart:async';
import 'dart:math';

void main(List<String> args){
  InternetAddress multicastAddress = new InternetAddress('239.10.10.100');
  int multicastPort = 4545;
  Random rng = new Random();
  RawDatagramSocket.bind(InternetAddress.ANY_IP_V4, 0).then((RawDatagramSocket s) {
    print("UDP Socket ready to send to group "
      "${multicastAddress.address}:${multicastPort}");

    new Timer.periodic(new Duration(seconds: 1), (Timer t) {
      //Send a random number out every second
      String msg = '${rng.nextInt(1000)}';
      stdout.write("Sending $msg  \r");
      s.send('$msg\n'.codeUnits, multicastAddress, multicastPort);
    });
  });
}
To receive multicast content, extra steps must be taken to join the multicast group that you want to receive packets from. To join a multicast group you must issue an IGMP join command. To do this in Dart, you can use the RawDatagramSocket.joinMulticast(InternetAddress group, {NetworkInterface interface}) method. Another step that must be taken is to add a multicast route to your local routing table. Most people forget this step and can’t figure out why they are not receiving any packets. On Linux (Fedora and Ubuntu) you can add the appropriate route with the command sudo route add -net 224.0.0.0/4 dev eth0. Of course you should replace eth0 with whatever your device is actually called (on my fedora install my primary nic device is p34p1).
/*
   Multicast UDP client
   multicast_receive.dart
*/
import 'dart:io';

void main(List args){
  InternetAddress multicastAddress = new InternetAddress("239.10.10.100");
  int multicastPort = 4545;
  RawDatagramSocket.bind(InternetAddress.ANY_IP_V4, multicastPort)
    .then((RawDatagramSocket socket){
       print('Datagram socket ready to receive');
       print('${socket.address.address}:${socket.port}');

       socket.joinMulticast(multicastAddress);
       print('Multicast group joined');

       socket.listen((RawSocketEvent e){
         Datagram d = socket.receive();
         if (d == null) return;

         String message = new String.fromCharCodes(d.data).trim();
         print('Datagram from ${d.address.address}:${d.port}: ${message}');
       });
  });
}
Trouble shooting multicast
Multicast has a lot of moving parts. If you are trying to run these examples and are unfamiliar with using multicast it can be frustrating to get things functional. The first thing you should check is that you are transmitting the multicast packets from the network card you intended. If you only have one network card then you can skip this step, but if you have more then one card you can add the route to the routing table so that all traffic is sent from the correct card.
On the receiving side, you will first want to make sure your firewall is not blocking multicast traffic. Fedora Linux ships with a firewall that blocks this traffic, so if you are using Fedora and are familiar with iptables you can either add the correct rule to allow the traffic, or just run sudo iptables -F to flush the firewall rules and let all traffic through.
Next you will want to make sure you have the multicast route correctly set up. On Linux you can use the command route -n to view your routing table. It should look like the one below.
$ route -n
Kernel IP routing table
Destination     Gateway         Genmask         Flags Metric Ref    Use Iface
0.0.0.0         192.168.1.1     0.0.0.0         UG    0      0        0 eth0
169.254.0.0     0.0.0.0         255.255.0.0     U     1000   0        0 eth0
192.168.1.0     0.0.0.0         255.255.255.0   U     1      0        0 eth0
224.0.0.0       0.0.0.0         240.0.0.0       U     0      0        0 eth0
If you don’t have a line in your routing table like the last line on the example above you can add it with the command sudo route add -net 224.0.0.0/4 dev eth0. This route is necessary to properly receive multicast traffic through the specified device.
Next you will want to check if the OS has issued the IGMP join for the group address. To do this on Linux you can run cat /proc/net/igmp and you will see output like the one shown below. Make sure you are actively running the multicast_receive.dart program first.
$ cat /proc/net/igmp
Idx	Device    : Count Querier	Group    Users Timer	Reporter
1	lo        :     1      V3
				        010000E0     1 0:00000000	0
2	eth0      :     2      V3
                                        640A0AEF     1 0:00000000    	0
                                        FB0000E0     1 0:00000000    	0
                                        010000E0     1 0:00000000    	0
In the second column you will see the device names of your network cards. You will want to find the rows under the card you have set your multicast route on. Under it you will see a column called “Group” which contains 8 characters. These characters are hex numbers (4 octets). In the first group of the above example, if you take each pair of 2 hex digits you get 64 0A 0A EF. If you convert those to decimal you will see the numbers are 100 10 10 239, which is our multicast group address in reverse order. If you see a line like this then you know the OS has issued the join for the group.
Finally you will want to make sure that your router can handle multicast traffic and that it is properly configured. More advanced routers have a feature called IGMP snooping, where they can intelligently route multicast packets only to those computers interested in receiving such traffic. Other, simpler routers simply forward the multicast packets to every destination. I am using a Linksys router with dd-wrt firmware installed and have no problem with multicast. I am sure your routers can also handle the traffic unless it is very old or mis-configured.
Multicast and the Internet
I should also make you aware that you can’t send multicast traffic over the public internet. All multicast packets are dropped by ISP routers. Supposedly Internet 2 does allow multicasting, but it is still in its very early stages and mostly deployed at universities. So multicast is really only good for broadcasting inside private networks. Keep that in mind before designing any software that relies on a multicast solution.
Wrapping up the Dart socket tour
Well I hope you have enjoyed this multi-part tour of socket programming with Dart. We have covered all of the sockets that are supported by the language. If you have missed any installments you can check out TCP/IP socket programming here, Websocket programming here, and Secure socket programming here. On the next installment of the Dart socket series I will cover some miscellaneous functionality that can be used to support sockets, and make more robust socket based programs. If you have any questions or feed back about the code above, feel free to leave a comment.
“WebSocket programming with Dart 1.1”
2014-01-27
WebSockets are the new hotness when programming client side web applications. They eliminate the need for AJAX polling and other annoying workarounds that have been employed to make up for the fact that HTTP is a request-response protocol. WebSockets provide a full-duplex (two way) communications channel over a single TCP connection. They look and feel just like any other TCP socket, but are initiated over a standard HTTP upgrade request. This prevents any issues with firewalls and the like. If you can open a web page, you can use WebSockets (assuming your browser supports it).
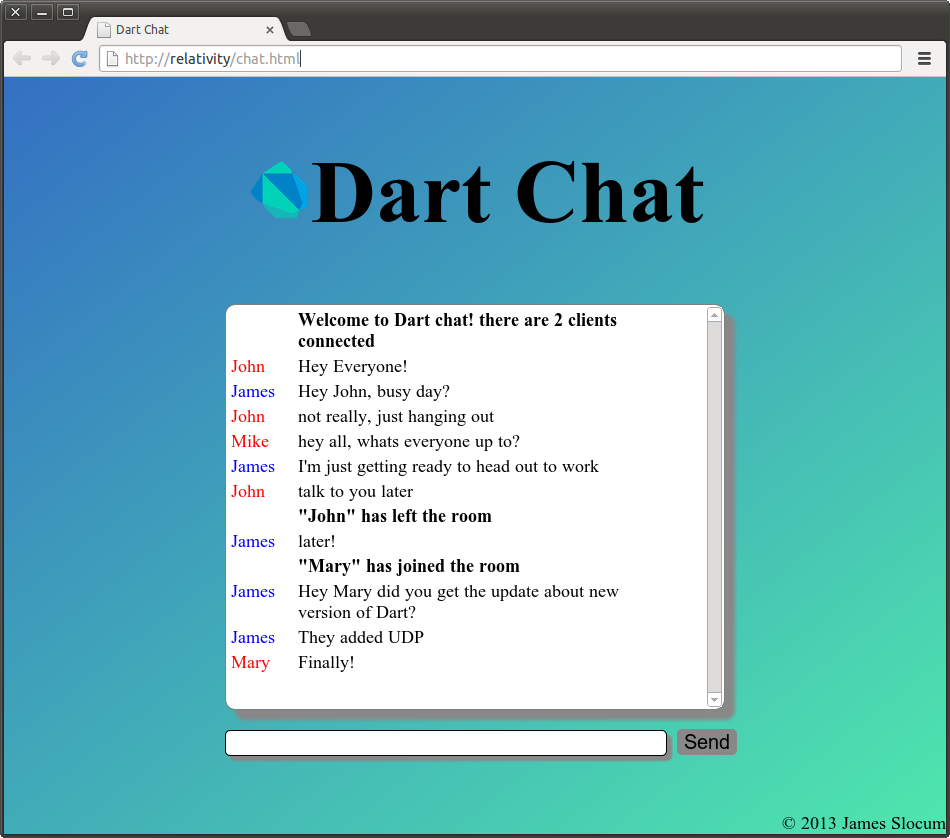
In this installment, I will be covering Dart WebSockets stem to stern. I will show how to set up a WebSocket server. How to connect from both a CLI client and web browser, and wrap it up with a small demo called Dart Chat. The version of Dart I am using is Dart VM version: 1.1.1 (Wed Jan 15 04:11:49 2014) on “linux_x64”.
What are WebSockets?
As stated previously, WebSockets are a protocol that allows for a full-duplex connection to be made between a client side web application, and a web server. HTTP is a simple protocol. The client makes a request for some resource, and the server replies with that resource, or an error. If a user wants to receive “notifications” from a server they could either poll (make requests at some set interval) a resource URI, or for newer applications, can take advantage of server sent events. Don’t get me wrong, these methods have their place and do work for a majority of applications, but what do you do if you need two way real-time updating? This is where WebSockets find their niche. Server sent events are great for applications that use a publish-subscribe architecture (like twitter feeds). WebSockets are great for two way real time updates where the state of the application can change on both the client and server in a significant way. The most common place to find WebSockets is in multi player games.
A Look at an Upgrade Transaction
WebSocket connections are made through a WebSocket handshake request. The request is just a regular HTTP request with an upgrade flag in the header. Along with the upgrade the client request will carry a Sec-WebSocket-Key. This key is a base64 encoded random value. This value is used by the server to generate a Sec-WebSocket-Accept response. The string it sends back is the decoded key with the magic string 258EAFA5-E914-47DA-95CA-C5AB0DC85B11 appended to it. The resulting string is hashed with SHA-1 and re-encoded into base64. Below is the transaction between the WebSocket echo server, and a local client captured using Wireshark.
# Request from client to server
GET / HTTP/1.1
Request Method: GET
Request URI: /
Request Version: HTTP/1.1
Upgrade: websocket
Connection: Upgrade
Host: relativity:8080
Origin: null
Pragma: no-cache
Cache-Control: no-cache
Sec-WebSocket-Key: 2YeHa81dWUbaxoD6kxPsmg==
Sec-WebSocket-Version: 13
Sec-WebSocket-Extensions: x-webkit-deflate-frame
User-Agent: Mozilla/5.0 (X11; Linux x86_64) AppleWebKit/537.36
   (KHTML, like Gecko) Chrome/31.0.1650.39 (Dart) Safari/537.36

# response from server
HTTP/1.1 101 Switching Protocols
Request Version: HTTP/1.1
Status Code: 101
Response Phrase: Switching Protocols
server: DartEcho (1.0) by James Slocum
connection: Upgrade
upgrade: websocket
sec-websocket-accept: 6C4pHheu6O23Vk894/B30FrzYzo=
content-length: 0
WebSocket Server
Enough theory, lets get to some practice! In Dart, setting up a WebSocket server starts by setting up a regular web server. Since the WebSocket connection comes in as an HTTP upgrade request, we need to check the request header for the value of the upgrade flag. The WebSocketTransformer class provides a helper method to check this for you called isUpgradeRequest(HTTPRequest request). Once you know you have an upgrade, you can send the request to the WebSocketTransformer.upgrade(HttpRequest request) method to convert it into a WebSocket object.
import 'dart:io';
import 'dart:convert';

void main() {
  HttpServer.bind(InternetAddress.ANY_IP_V4, 8080).then((HttpServer server) {
    print("HttpServer listening...");
    server.serverHeader = "DartEcho (1.0) by James Slocum";
    server.listen((HttpRequest request) {
      if (WebSocketTransformer.isUpgradeRequest(request)){
        WebSocketTransformer.upgrade(request).then(handleWebSocket);
      }
      else {
        print("Regular ${request.method} request for: ${request.uri.path}");
        serveRequest(request);
      }
    });
  });
}

void handleWebSocket(WebSocket socket){
  print('Client connected!');
  socket.listen((String s) {
    print('Client sent: $s');
    socket.add('echo: $s');
  },
  onDone: () {
    print('Client disconnected');
  });
}

void serveRequest(HttpRequest request){
  request.response.statusCode = HttpStatus.FORBIDDEN;
  request.response.reasonPhrase = "WebSocket connections only";
  request.response.close();
}
In this code from sampleserver.dart we can see that a regular HTTP server is started in main(). The server listens for incoming requests and if it gets one, it looks to see if it is an upgrade. If this is the case it is passed to the WebSocketTransformer.upgrade() method. This method returns a Future<WebSocket> object that can we waited on. When it is ready we send it to the handleWebSocket(WebSocket socket) function to have the onData() and onDone() callbacks registered. When a message is sent as text, the onData() callback will receive a String, but when it is sent as binary (like an image file) it will receive a List<int>.
If the request is not a WebSocket request, then we simply reject it with a forbidden (403) return code. Of course you are welcome to expand on this part of the application and serve anything you want. I just felt it was simpler to isolate the WebSocket code for this example.
Browser WebSocket Client
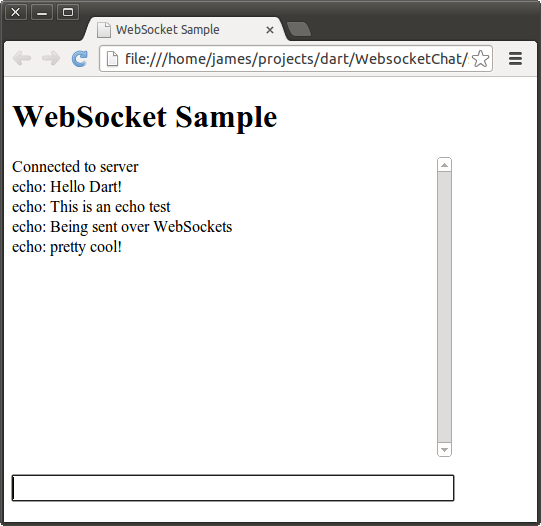
The first WebSocket client that I am going to show is a browser client using the dart:html library. This will require the use of some HTML and CSS. To get started I will write up the HTML page called sampleclient.html that will hold the input TextInputElement and the output ParagraphElement. The HTML and CSS are pretty straight forward so you should not have too much of an issue following them.
<!DOCTYPE html>
<html>
   <head>
      <title>WebSocket Sample</title>
      <link rel="stylesheet" href="sampleclient.css"></link>
   </head>

   <body>
      <h1>WebSocket Sample</h1>
      <p id="output">
      </p>
      <input id="input" type="text"></input>

      <script type="application/dart" src="sampleclient.dart"></script>
      <script src="packages/browser/dart.js"></script>
   </body>
</html>
Next is the sampleclient.css style sheet to apply a very basic style to the page.
#input {
   width: 440px;
   font-size: 18px;
   border-style: solid;
   border-style: black;
   border-width: 1px;
}

#output {
   width: 440px;
   height: 300px;
   font-size: 16px;
   overflow-y: scroll;
}
Finally, let’s take a look at the Dart source in sampleclient.dart.
import 'dart:html';

void main() {
  TextInputElement input = querySelector('#input');
  ParagraphElement output = querySelector('#output');

  String server = 'ws://localhost:8080/';
  WebSocket ws = new WebSocket(server);
  ws.onOpen.listen((Event e) {
    outputMessage(output, 'Connected to server');
  });

  ws.onMessage.listen((MessageEvent e){
    outputMessage(output, e.data);
  });

  ws.onClose.listen((Event e) {
    outputMessage(output, 'Connection to server lost...');
  });

  input.onChange.listen((Event e){
    ws.send(input.value.trim());
    input.value = "";
  });
}

void outputMessage(Element e, String message){
  print(message);
  e.appendText(message);
  e.appendHtml('<br/>');

  //Make sure we 'autoscroll' the new messages
  e.scrollTop = e.scrollHeight;
}
To open a WebSocket connection to the server, I simply call the WebSocket constructor with the URI of the server. The dart:html WebSocket class provides several specific events that can be listened for. The onOpen event is called when the WebSocket connection has been established. The onMessage event is called every time data is available to read from the socket. The onClose Event is called when the server has shutdown, and the socket is no longer available. I hook each of these events up to the outputMessage() function that will output what the server has sent to a ParagraphElement object.
To test this application out, simple run the sampleserver.dart program, and then open sampleclient.html in dartium. Don’t forget to run pub install first to get the bootstrap if you are using my example code.
$ dart sampleserver.dart
HttpServer listening...
Client connected!
Client sent: Hello Dart!
Client sent: This is an echo test
Client sent: Being sent over WebSockets
Client sent: pretty cool!
Client disconnected
A Command Line WebSocket Client
WebSockets are not limited to the client side! It’s quite easy to open a WebSocket connection from a command line application using the dart:io WebSocket class. The WebSocket in dart:io works a bit differently then the one in dart:html. Let’s take a look at the command line client code, and then I will go over some differences.
import 'dart:io';

WebSocket ws;

void main(List<String> args){
  if (args.length < 1){
    print('Please specify a server URI. ex ws://example.org');
    exit(1);
  }

  String server = args[0];

  //Open the websocket and attach the callbacks
  WebSocket.connect(server).then((WebSocket socket) {
    ws = socket;
    ws.listen(onMessage, onDone: connectionClosed);
  });

  //Attach to stdin to read from the keyboard
  stdin.listen(onInput);
}

void onMessage(String message){
  print(message);
}

void connectionClosed() {
  print('Connection to server closed');
}

void onInput(List<int> input){
  String message = new String.fromCharCodes(input).trim();

  //Exit gracefully if the user types 'quit'
  if (message == 'quit'){
    ws.close();
    exit(0);
  }

  ws.add(message);
}
The first major difference that should pop out at you is that the dart:io WebSocket is created and connected using the WebSocket.connect() method that returns a Future<WebSocket>. The dart:html WebSocket is created using its constructor. The HTML version of the WebSocket also exposes several separate event hooks for receiving messages, knowing when a connection is made, and knowing when a connection is closed. The io version provides the “classic” listen(void onData(T event), {Function onError, void onDone(), bool cancelOnError}) interface for registering callbacks. The HTML version also has a send() method to transmit data, while the io version has add(). There is currently an open ticket for unifying these WebSocket interfaces.
$ dart sampleserver.dart
HttpServer listening...
Client connected!
Client sent: Hello from the command line
Client sent: Now I can create one type of socket, and use it for applications and webapps
Client sent: hurray!
Client disconnected

$ dart samplecliclient.dart ws://localhost:8080
Hello from the command line
echo: Hello from the command line
Now I can create one type of socket, and use it for applications and webapps
echo: Now I can create one type of socket, and use it for applications and webapps
hurray!
echo: hurray!
quit
Project Files and Further Reading
The full source for these sample files can be found here. Also included is a WebSocket based chat application called DartChat. To run the applications un-tar the archive and run the command pub install. This will install all of the application dependencies, and the bootstrap script. From there feel free to use the sampleserver.dart to run the simple echo server, or run server.dart to run the full chat server. To run the chat client, open chat.html in dartium. If you have any questions about the functionality of the chat system feel free to leave a comment below!
$ tar -zxvf dart_websockets.tar.gz
$ pub install
$ dart server.dart &
$ dartium chat.html
In the next installment, I will be covering the freshly released RawDatagramSocket class that will handle UDP communications in Dart.
“Secure Sockets and Servers with Dart 1.0”
2013-12-14
My last post on Socket Programming with Dart was a huge hit and I got some requests to follow it up with a websockets version. I am more then happy to oblige, but before I can dive into websockets and the Dart HTTP API stack, I want to first show how to set up and use secure sockets. Why cover secure sockets? Well if we are going to write a web facing chat server I think those messages should be encrypted.
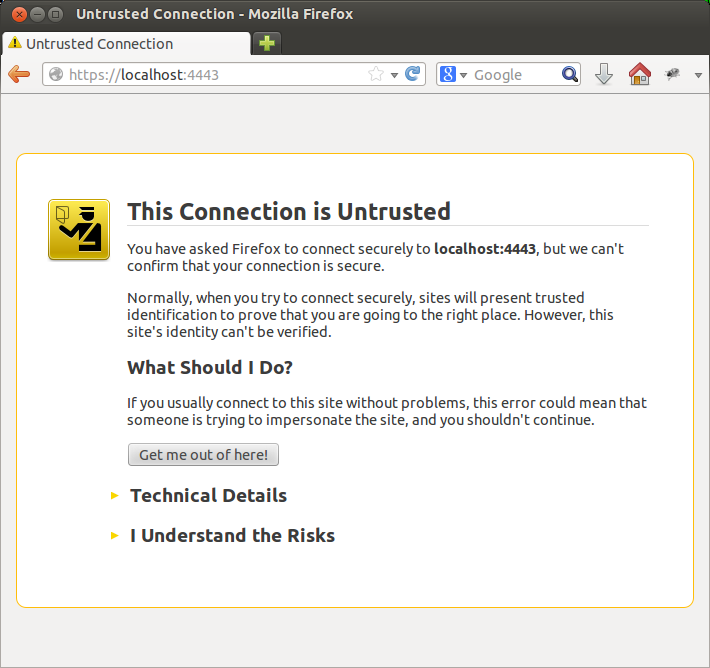
Dart secure sockets and secure servers use SSL/TSL security. More specifically they rely on X.509 certificates to validate servers and (optionally) clients. The server will hand out a certificate that will verify itself to the client. If the client accepts the certificate it will exchange symmetric session keys used to encrypt the communications between them. In a production environment the X.509 certificate is signed and verified by a 3rd party called a certificate authority. Web browsers usually have a list of trusted authorities that they will accept signatures from.
In our development environment, we are going to create self signed certificates for our secure severs. Does self signed mean insecure? No, the data will still be encrypted as one would expect, but our clients will get a warning that we are not recognized as a valid signing authority. In fact it’s funny looking around the web at how many large we companies are trusted as valid authorities, and self sign their certificates. Google is a good example of this, check out https://google.com and you will see the certificate is verified by Google Inc.
The Dart implementation of SSL/TSL security uses a Network Security Services (NSS) database to store the server private key and certificate in. Before we begin programming and using secure sockets with Dart we must first set up the database.
Setting up an NSS Key Database
Network Security Services or NSS is a set of libraries and tools to create secure server and client applications. It is provided by the Mozilla Foundation and is used in many of their products. To start setting up the database, you must first install the NSS tools. On Ubuntu it’s simply sudo apt-get install libnss3-tools. On Fedora 17 you can use sudo yum install nss-tools. On OSX you can use brew install nss . For more specific installion instructions you can check out The Mozilla wiki (look at part 3).
Once you have the tools installed, you can use the command line application called certutil to create a new key database, and create a self signed development certificate. To create the database, use the commands
$ echo "[my secret password]" > pwdfile
$ certutil -N -d 'sql:./' -f pwdfile

$ ls
pwdfile  cert9.db  key4.db  pkcs11.txt
Let’s break down this command. The -N flag says to create a new database. The -d 'sql:./' flag says to create a new cert9.db and key4.db file in the current directory. The “sql:” prefix is necessary to indicate that you want the newer format. If you forget the “sql:” prefix then you will get the old cert8.db and key3.db files, which are not compatible with Dart! The -f pwdfile flag says to use the file ‘pwdfile’ as a password file. Before you create the database, you should echo a password into a password file to use for the rest of the commands.
Okay, so now we have an empty key database. Let’s create a self signed certificate so we can start developing our application. In a production environment we would create a certificate request, then send the request to some certificate authority to have a certificate issues. Once the certificate is issued we would load it into the NSS database. However that is more work (and cost) than is needed for a simple development project. Creating a self signed certificate will still let us experiment, but will throw a warning to our connecting clients (like web browsers).
$ certutil -S -s "cn=dartcert" -n "self signed for dart" -x -t "C,C,C" \
  -m 1000 -v 120 -d "sql:./" -k rsa -g 2048 -f pwdfile


  A random seed must be generated that will be used in the
  creation of your key.  One of the easiest ways to create a
  random seed is to use the timing of keystrokes on a keyboard.

  To begin, type keys on the keyboard until this progress meter
  is full.  DO NOT USE THE AUTOREPEAT FUNCTION ON YOUR KEYBOARD!


  Continue typing until the progress meter is full:

  [**********                                          ]
There are a ton of flags in that last command, lets break them down. The -S flag makes a certificate and adds it to the database. The -s "cn=dartcert" flag specifies the subject line, and sets the common name to “dartcert”. -n "self signed for dart" sets the nickname of the certificate. -x tells it to self sign, and -t "C,C,C" sets the certificates trust attributes. In our case we are setting all three of attributes to “trusted CA to issue server certs.” The -v 120 flag makes the certificate valid for 120 months. Finally the -k rsa -g 2048 flags tell certutil to use an RSA algorithm with a 2048 bit key. Feel free to use a stronger key, up to 8192 bits.
After you run the command, you will be prompted to mash the keyboard to generate some entropy to seed the algorithm. Now your certificate is ready for use. You can view the certificates in the database with the command certutil -L -d 'sql:./'. Keep in mind that this is the bare minimum you need to create a self signed certificate. For more options you can use the command certutil -H, or check out some examples at the Mozilla Foundation NSS page.
Creating a Secure Server
Alright! Now that we have our database set up and a certificate that we can use lets get to some coding. To get stated we are going to work with the SecureServerSocket and SecureSocket classes.
import 'dart:io';
void main() {
String password = new File('pwdfile').readAsStringSync().trim();
SecureSocket.initialize(database: "./",
password: password);
SecureServerSocket.bind(InternetAddress.ANY_IP_V4, 4777, "CN=dartcert")
.then((SecureServerSocket ss) {
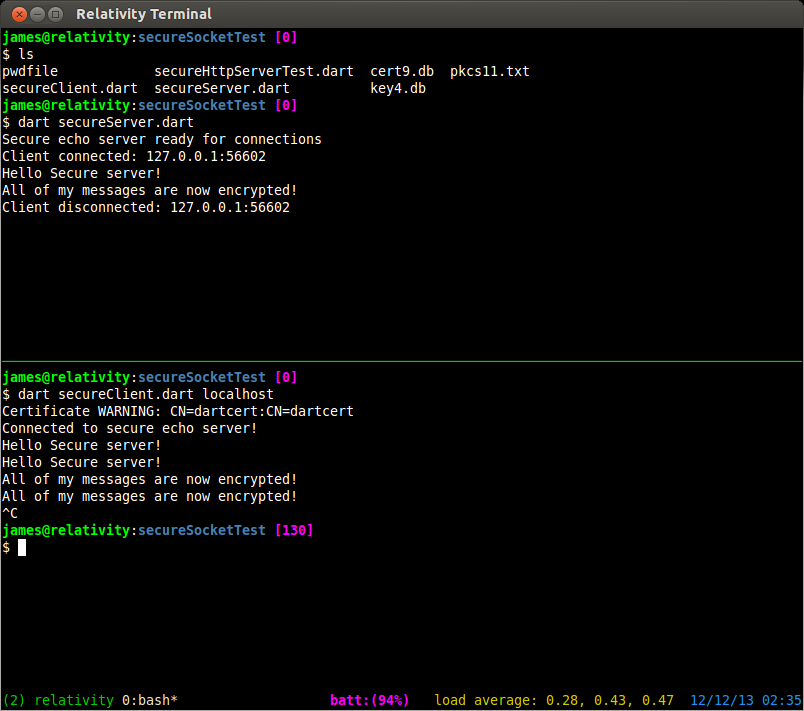
print("Secure echo server ready for connections");
ss.listen((SecureSocket sClient) {
print("Client connected: "
"${sClient.remoteAddress.address}:${sClient.remotePort}");
sClient.write("Connected to secure echo server!");
sClient.listen((List data) {
String message = new String.fromCharCodes(data).trim();
print(message);
sClient.write(message);
},
onDone: () {
print("Client disconnected: "
"${sClient.remoteAddress.address}:${sClient.remotePort}");
sClient.destroy();
});
},
onError : (error){
print(error);
});
});
}
The first thing that needed to be done was get connected to the NSS database. since I have stored the password to the database in a file, I will simply read the password from that file in my server program. To do that I use File.readAsStringSync(). The “Sync” tells dart to make a blocking read on that file, and prevent the rest of the program from running until it’s complete. To open up the database I use SecureSocket.initialize() to tell Dart where to find it, and the password to use to get in. To create a secure server socket I use SecureServerSocket.bind() and pass it three parameters. The first is what interface to listen on. Just like last time I want to listen on all of them. The second is what port to bind to. Any port above 1024 is okay to use (as long as some other program hasn’t bound to it first). The third parameter tells Dart what certificate to use to establish new secure connections. The name I use is exactly the same as the name I provided to certutil when I created the certificate.
From this point forward, everything should look familiar. The code is exactly the same as the regular socket code. You listen() for new connections, and handle them accordingly.
Connecting to a Secure Server
So now we have our secure server, how do we securely connect a new client? We cant just use telnet anymore because of the TSL handshake that establishes the secure connection. We need to write our own client for this server.
import 'dart:io';

void main(List<String> args) {
  if (args.length < 1){
    print("Please specify a hostname or IP");
    return;
  }

  String host = args[0];
  SecureSocket socket;
  SecureSocket.connect(host, 4777, onBadCertificate: (X509Certificate c) {
    print("Certificate WARNING: ${c.issuer}:${c.subject}");
    return true;
  }).then((SecureSocket ss) {
      socket = ss;

      socket.listen((List data) {
        String message = new String.fromCharCodes(data).trim();
        print(message);
      },
      onDone: () {
        print("Lost connection to server");
        socket.destroy();
      });
    });

  stdin.listen((List data) {
    String input = new String.fromCharCodes(data).trim();
    socket.write(input);
  });
}
This should also look pretty familiar for the most part. The only real difference between this program, and one that uses regular sockets is the onBadCertificate callback. To connect to the server we simply use SecureSocket.connect() and pass it a host or IP address, and a port number. The onBadCertificate callback must return a bool that indicates whether to accept or reject a “bad” certificate. Our self signed certificate will trigger this callback, so we need to return true in order to use this client with our current certificate. If you happen to have a valid certificate issued from a trusted certificate authority you should not have this issue.
Creating a secure HTTP server
Creating a secure HTTP server is as easy as creating a secure socket. The only difference is that we use the HttpServer.bindSecure() method. We still specify what devices to listen on, what port to use, and the name of our certificate. We also still need to use the SecureSocket.initalize() method to tell our program where to find our certificate database.
import 'dart:io';
void main(){
String password = new File('pwdfile').readAdStringSync().trim();
SecureSocket.initialize(database: "./",
password: password);
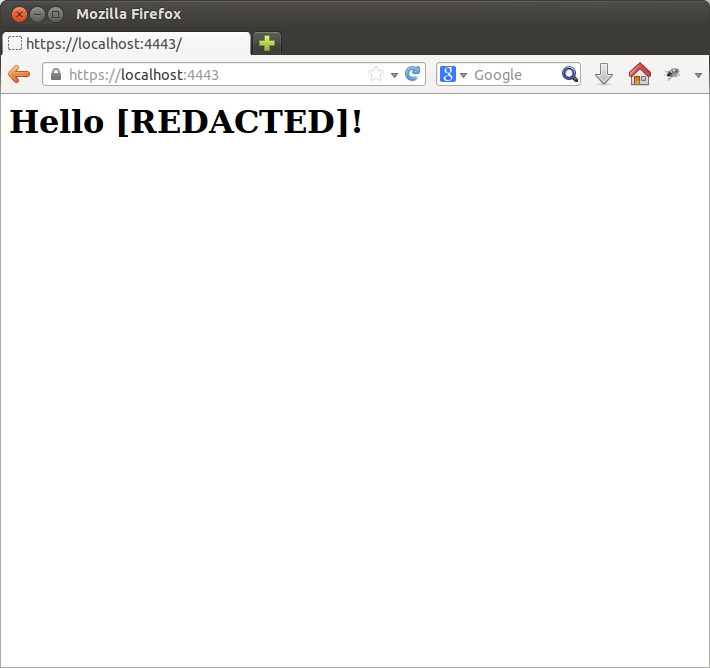
HttpServer.bindSecure(InternetAddress.ANY_IP_V4, 4443,
certificateName: "CN=dartcert")
.then((HttpServer server) {
server.listen((HttpRequest request) {
print('Request for ${request.uri.path}');
request.response.write(
"<html><body><h1>"
"Hello [REDACTED]!"
"<//h1><//body><//html>");
request.response.close();
});
});
}
Now you can fire up an instance with dart secureHttpServer.dart and point your browser to http://localhost:4443. You can add an exception for your self signed certificate. Normally I would NEVER advocate accepting a certificate exception, but since it’s ours, and it’s localhost, there’s no risk.
$ dart secureHttpServer.dart
Request for /
Request for /favicon.ico
Request for /favicon.ico
Now that we have gotten that out of the way, next time I will present another chat server and client implemented with Dart websockets. I must admit I was pleasantly surprised by how natural and effortless it is to program in Dart on the client side! Stay tuned for the next part in the series.
“Network Socket Programming with Dart 1.0”
2013-11-20
It’s hard to believe that I started writing about Google Dart a year ago this November, and almost like clock work Dart SDK 1.0 was released on November 14th. With the release of version 1.0 comes a full web development environment that rivals what is currently available with Javascript. While the client side web stuff is super cool and powerful, I love that it has server side utilities as well. It’s kinda like using Javascript in the browser and Node.js on the server. Dart is a complete package!
To kick off the release of version 1.0 I’m going to run a series on Dart. I am not sure where it will go, but my goal is to cover classes and topics not really covered by other sites. For this installment I am going to cover socket programming in Dart on the server side.
To prevent another fiasco I will disclose that I am using the Dart VM 1.0.0.3_r30188 on 64 bit Ubuntu Linux. All of the below code was written for and tested against that version. If you have any issues check your version first, then leave me a comment below. Let’s dive in!
What is a network socket?
In the broad sense, a socket is an endpoint to an interprocess communications connection across a network. They are usually implemented in the transport layer of the OSI model. For this exercise you can simply think of them as an interface to get your program sending and receiving data across a network, or over the Internet. Dart socket objects are implemented on TCP/IP. Dart does not support UDP at the moment Edit: UDP is now supported and covered on this page. Other types of sockets exist, such as Unix domain sockets and websockets, but those won’t be covered here.
In this article we are concerned with two classes from the dart:io API. the first is Socket which we can use to establish a connection to a server as a client. The second is ServerSocket which we will use to create a server, and accept client connections.
Client connections
The Socket class has a static method called Connect(host, int port). The host parameter can be either a String with a host name or IP address, or an InternetAddress object. Connect will return a Future<Socket> object that will make the connection asynchronously. To know when a connection is actually made, we will register a Future.then(void onValue(T value)) callback. Lets take a look.
/*
   file: socketexample.dart
   Author: James Slocum
*/

import 'dart:io';

void main() {
  Socket.connect("google.com", 80).then((socket) {
    print('Connected to: '
      '${socket.remoteAddress.address}:${socket.remotePort}');
    socket.destroy();
  });
}
In the above example we opened a connection to google.com on port 80. Port 80 is the port that serves web pages. After the socket is connected to the server, the IP and port that it is connected to are printed to the screen and the socket is shutdown. By shutting down the socket using Socket.destroy() we are telling dart that we don’t want to send or receive any more data on that connection. When you run this program (assuming you have a connection to the internet and DNS is working properly) you should see a similar output to the one below.
$ dart socketexample.dart
Connected to: 173.194.43.36:80
You see, nothing too it! Dart does all of the heavy lifting of looking up the IP for google.com, and establishing the connection over TCP. All your code has to do is sit back and wait. Lets take it a step further. Lets request the index page from google after we have connected. In order to accomplish this we must do two things. First we have to send a request for the page, and second we must have a way of receiving the response. In order to send data over a socket we have to use the Socket.write(String data) method. To receive data we have to register an onData() callback using the Socket.listen(void onData(data)) method. For this example we will also register an optional onDone() callback to let us know when the server has closed the connection.
/*
  file: getindexexample.dart
  author: James Slocum
*/
import 'dart:io';

void main() {

  String indexRequest = 'GET / HTTP/1.1\nConnection: close\n\n';

  //connect to google port 80
  Socket.connect("google.com", 80).then((socket) {
    print('Connected to: '
      '${socket.remoteAddress.address}:${socket.remotePort}');

    //Establish the onData, and onDone callbacks
    socket.listen((data) {
      print(new String.fromCharCodes(data).trim());
    },
    onDone: () {
      print("Done");
      socket.destroy();
    });

    //Send the request
    socket.write(indexRequest);
  });
}
Note: This program is just to illustrate the use of Sockets and how they work. I would not advocate connecting to an HTTP server using raw TCP sockets. Dart offers an HttpClient class that provides much more functionality.
When you run the above code, you should see the HTTP/1.1 response headers followed by the contents of the index page. This little application can be a great tool for learning about web protocols. You can also see exactly what cookies are being set, and their values.
$ dart getindexexample.dart
Connected to: 173.194.43.38:80
HTTP/1.1 200 OK
Date: Tue, 19 Nov 2013 02:05:33 GMT
Expires: -1
Cache-Control: private, max-age=0
Content-Type: text/html; charset=ISO-8859-1
...
...
(headers and HTML code)
...
</script></body></html>
Done
Server Sockets
As you can see, making remote connections to a server is easy when you use the Dart Socket object. So what do you do if you want remote clients to connect to you? For that we can use the ServerSocket object. In order to create a server that can handle client connections, we must first bind to a specific TCP port that we will listen on. To do this we can use the static ServerSocket.bind(address, int port) method. This will return a Future<ServerSocket>. Once again we will use the Future.then(void onValue(T value)) method to register our callback so we know when the socket has been bound to the port. Make sure to choose a port higher then 1024. Ports lower then that are in the reserved range and may require root or administrator permissions to bind. In my examples I use port 4567.
/**
  file: serverexample.dart
  author: James Slocum

  Simple server that will
     1) accept a new connection
     2) say hello
     3) close the connection
*/

import 'dart:io';

void main() {
  ServerSocket.bind(InternetAddress.ANY_IP_V4, 4567).then(
    (ServerSocket server) {
      server.listen(handleClient);
    }
  );
}

void handleClient(Socket client){
  print('Connection from '
    '${client.remoteAddress.address}:${client.remotePort}');

  client.write("Hello from simple server!\n");
  client.close();
}
You should notice a big difference from last time. Instead of listening for binary data from our connection, we are listening for client connections. When we get a connection, it calls our handleClient(Socket client) function with a Socket object that represents the client connection. Going forward we will use this client socket object to send data to, and receive data from this specific client. To run this example we need to use two terminals. In the first on you can run the server, and in the second you can use telnet as the client application.
#First terminal
$ dart serverexample.dart
Connection from 127.0.0.1:47347  #After we run telnet in another terminal

#Second terminal
$ telnet localhost 4567
Trying 127.0.0.1...
Connected to localhost.
Escape character is '^]'.
Hello from simple server!
Connection closed by foreign host.
I also want to point out the use of InternetAddress.ANY_IP_V4 which tells the ServerSocket that it’s free to accept connections on any device that supports IPv4. In my case that is my ethernet card, my wireless card, and my loopback device (localhost). If you want to bind to a specific ethernet device, you can use a string with the IP address of that device and it will be the only one that can receive connections for the specified port.
You will notice when you run the above server example that it does not exit after it closes the client connection. In fact it will keep accepting new clients, sending them the hello string, and closing the connection. That is because of Darts asyncronous io model. The nice part about this is that we don’t have to spawn any threads or explicitly tell the server socket to start listening for another connection. It does this all on its own!
Simple chat room server project
Now that we got our feet wet with some sample programs, it’s time to step it up and write some cool code. Lets write a simple chat room server. The server will accept connections from clients and add them to the room. When a client sends a message to the room, all other connected clients will receive it. It should also gracefully handle errors and disconnections.
We can build off of our serverexample.dart program. The first problem to tackle is how to know which client is sending a message. When a callback is called, there is no way to know which socket called it. To get around this issue we will make a ChatClient class that will wrap the client socket object and provide the callback functions.
...
...

class ChatClient {
  Socket _socket;
  String _address;
  int _port;

  ChatClient(Socket s){
    _socket = s;
    _address = _socket.remoteAddress.address;
    _port = _socket.remotePort;

    _socket.listen(messageHandler,
        onError: errorHandler,
        onDone: finishedHandler);
  }

  void messageHandler(List data){
    String message = new String.fromCharCodes(data).trim();
    distributeMessage(this, '${_address}:${_port} Message: $message');
  }

  void errorHandler(error){
    print('${_address}:${_port} Error: $error');
    removeClient(this);
    _socket.close();
  }

  void finishedHandler() {
    print('${_address}:${_port} Disconnected');
    removeClient(this);
    _socket.close();
  }

  void write(String message){
    _socket.write(message);
  }
}

...
...
This class is simple but necessary. The constructor takes in a Socket object which it will hold internally. It also provides the onData(), onError() and onDone() callback functions that will be used by the socket. The messageHandler() function will read a message from the client and distribute it to the other clients. Lets take a look at the distributeMessage(ChatClient client, String message) function to see how it works.
...
List<ChatClient> clients = [];

void distributeMessage(ChatClient client, String message){
  for (ChatClient c in clients) {
    if (c != client){
      c.write(message + "\n");
    }
  }
}
...
The distributeMesssage() function will iterate though the list of connected clients and forward the received message to them all. The clients list acts as our chat room. When a client connects they are added to the room by the handleConnection(Socket client) function which is registered as a callback to the server socket.
ServerSocket server;
void main() {
ServerSocket.bind(InternetAddress.ANY_IP_V4, 4567)
.then((ServerSocket socket) {
server = socket;
server.listen((client) {
handleConnection(client);
});
});
}
void handleConnection(Socket client){
print('Connection from '
'${client.remoteAddress.address}:${client.remotePort}');
clients.add(new ChatClient(client));
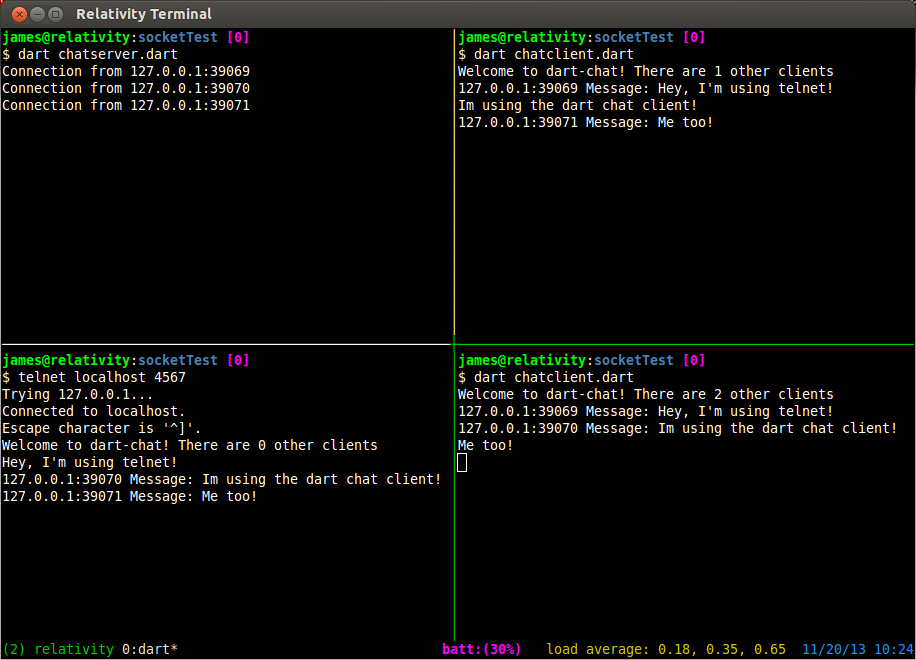
client.write("Welcome to dart-chat! "
"There are ${clients.length - 1} other clients\n");
}
Finally when a client disconnects from the chat server, the ChatClient object will remove itself from the client list by calling removeClient(ChatClient client). After it has removed itself from the room it closes the socket.
void removeClient(ChatClient client){
  clients.remove(client);
}
You can download the full chat server source code here. To run it simply extract the files and run
$ dart chatserver.dart
To test it out can you use telnet again.
$ telnet localhost 4567
Chat room client
To wrap up this installment let’s implement our own chat room client instead of having to rely on other programs. The client is much simpler then the server. It simply needs to connect to the server, have a way to receive messages, and a way to read messages from the user and send them to the server. As we saw in previous examples, connecting to the server and sending it a message is a snap, so the only new part is reading from the user. To do this we can use the Stdin class. dart:io has a global instance of Stdin open called stdin, so all we need to do is register the onData() call back with it.
import 'dart:io';

Socket socket;

void main() {
  Socket.connect("localhost", 4567)
    .then((Socket sock) {
      socket = sock;
      socket.listen(dataHandler,
        onError: errorHandler,
        onDone: doneHandler,
        cancelOnError: false);
    })
    .catchError((AsyncError e) {
      print("Unable to connect: $e");
      exit(1);
    });

  //Connect standard in to the socket
  stdin.listen((data) =>
      socket.write(
        new String.fromCharCodes(data).trim() + '\n'));
}

void dataHandler(data){
  print(new String.fromCharCodes(data).trim());
}

void errorHandler(error, StackTrace trace){
  print(error);
}

void doneHandler(){
  socket.destroy();
  exit(0);
}
To use this client simply run the command
$ dart chatclient.dart
after you have started the server.
Try running multiple instances of the client and typing in each of them. You will see the messages getting passed around to the other clients. What’s nice is that it doesn’t matter if the clients are using telnet or the custom chatclient.dart program because of the simple text based nature of the server. You can also use the client to connect over a network or the internet by putting the correct IP into the Socket.connect(host, int port) method.
Please feel free to expand on the server and client programs! Some things you might want to consider adding are user names, private messaging different users, file sharing, and multiple rooms. Have fun with it! If you have any questions please leave me a comment below.
“Testing Memory I/O Bandwidth”
2013-10-16
Very frequently at my company, we find ourselves pushing our hardware to its limit. Usually we are able to dig in and find some optimizations that we may have missed before to squeeze some extra performance out of our products. This time started out a little different though. The issue we were seeing did not seem to be caused by CPU speed or memory capacity, but I/O bandwidth.
In an attempt to quadruple the output of one of our products, we hit a hard wall when running at the peak stress level. The developer on the project Stephen and I began brain storming on what the issue might be and why we were hitting a cap. All of the specs on paper seem to indicate we had more then enough machine to get the job done.
In order to start diagnosing our problem, we looked to a program called mbw which is a memory bandwidth benchmark tool. We installed it from the Ubuntu repository using sudo apt-get install mbw. As we found out later, this installed version 1.1.1 of this software (and yes this is important… keep reading). Running the software is easy. The simplest option is to just pass in an array size (in MB). For brevity I am only showing the average results, instead of all results.
$ mbw 32 | grep AVG
AVG     Method: MEMCPY  Elapsed: 0.00600  MiB: 32.00000   Copy: 5332.889 MiB/s
AVG     Method: DUMB    Elapsed: 0.00422   MiB: 32.00000   Copy: 7589.413 MiB/s
AVG     Method: MCBLOCK Elapsed: 0.00164  MiB: 32.00000   Copy: 19465.904 MiB/s
Another useful option is to specify the size of the “block” to use in the MCBLOCK test. To specify this option you can use the -b flag.
$ mbw -b 4096 32 | grep AVG
AVG     Method: MEMCPY  Elapsed: 0.00589  MiB: 32.00000   Copy: 5428.421 MiB/s
AVG     Method: DUMB    Elapsed: 0.00421   MiB: 32.00000   Copy: 7598.062 MiB/s
AVG     Method: MCBLOCK Elapsed: 0.00064  MiB: 32.00000   Copy: 50172.468 MiB/s
Woah! Hold the phone! Do you notice something about these results? Why is the MCBLOCK test a whole order of magnitude faster then the MEMCPY test? This made Stephen and my jaws drop. What was being done to get this much throughput? This is where the story really begins.
This first thing we did was grab a copy of the source. The first source that we found was for version 1.2.2 (At this time we didn’t know it was different then the version we had installed). We started digging through the source and found the worker function that performed the three tests.
if(type==1) { /* memcpy test */
  /* timer starts */
  gettimeofday(&starttime, NULL);
  memcpy(b, a, array_bytes);
  /* timer stops */
  gettimeofday(&endtime, NULL);
}
else if(type==2) { /* memcpy block test */
  gettimeofday(&starttime, NULL);
  for(t=0; t<array_bytes; t+=block_size) {
      b=mempcpy(b, a, block_size);
  }
  if(t>array_bytes) {
      b=mempcpy(b, a, t-array_bytes);
  }
  gettimeofday(&endtime, NULL);
}
else { /* dumb test */
  gettimeofday(&starttime, NULL);
  for(t=0; t<asize; t++) {
      b[t]=a[t];
  }
  gettimeofday(&endtime, NULL);
}
This is the code snippet from worker() in mbw.c on line 92. The first thing we discovered that that the MCBLOCK test was using the mempcpy() function. I had never used the mempcpy function before so I was intrigued! Of course the mystery only deepened when we looked at the mempcpy man page.
The mempcpy() function is nearly identical to the memcpy(3) function. It copies n bytes from the object beginning at src into the object pointed to by dest. But instead of returning the value of dest it returns a pointer to the byte following the last written byte.
mempcpy(3) man page
They really weren’t kidding with the “nearly identical” part either. As soon as I dug into the glibc source code, it became very apparent something strange was going on.
void *
__mempcpy (void *dest, const void *src, size_t len)
{
  return memcpy (dest, src, len) + len;
}
libc_hidden_def (__mempcpy)
weak_alias (__mempcpy, mempcpy)
libc_hidden_builtin_def (mempcpy)
So why was the mempcpy() code running so much faster than the memcpy() code if one is simply calling the other? The answer would soon surface! The next thing we did is compile the 1.2.2 source that we downloaded and ran it. To our amazement we were getting much lower bandwidth for what seemed like no reason.
$ ./mbw-1.2.2 -b 4096 8 | grep AVG
AVG     Method: MEMCPY  Elapsed: 0.00292  MiB: 8.00000    Copy: 2743.861 MiB/s
AVG     Method: DUMB    Elapsed: 0.00116  MiB: 8.00000    Copy: 6871.081 MiB/s
AVG     Method: MCBLOCK Elapsed: 0.00098  MiB: 8.00000    Copy: 8145.810 MiB/s
We didn’t understand, we didn’t change anything, we simply compiled and executed the code, and yet the Ubuntu package version was reporting huge bandwidths, and this version was not. I started to suspect that the version in the repo was different somehow, and I was right! We ran apt-get source mbw, and sure enough we got version 1.1.1. Running a diff between these two files showed that the MCBLOCK test was updated.
/* in version 1.1.1 */
for(t=0; t<array_bytes; t+=block_size) {
   c=mempcpy(b,a,block_size);
}

/* in version 1.2.2 */
for(t=0; t<array_bytes; t+=block_size) {
   b=mempcpy(b,a,block_size);
}
Well, that solves that mystery! The issue was that, in version 1.1.1 (installed by apt-get) , the program was writing the same block_size chunk of memory over and over causing heavy cache hits and speed up. This new version properly advances the destination pointer, thus eliminating the cache hits and lowering the bandwidth measurements.
Now, does anything else stand out about the 1.2.2 code? Well if you guessed that the source pointer was not being advanced, you would be correct! So these numbers were still a bit off. After making the correction we got much more consistent measurements.
/* in the corrected version (now 1.3.0) */
char* aa = (char*)a;
char* bb = (char*)b;
gettimeofday(&starttime, NULL);
for (t=array_bytes; t >= block_size; t-=block_size, aa+=block_size){
   bb=mempcpy(bb, aa, block_size);
}
if(t) {
   bb=mempcpy(bb, aa, t);
}
gettimeofday(&endtime, NULL);
$ ./mbw-1.3.0 -b 4096 8 | grep AVG
AVG     Method: MEMCPY  Elapsed: 0.00288  MiB: 8.00000    Copy: 2778.067 MiB/s
AVG     Method: DUMB    Elapsed: 0.00113  MiB: 8.00000    Copy: 7107.952 MiB/s
AVG     Method: MCBLOCK Elapsed: 0.00166  MiB: 8.00000    Copy: 4817.246 MiB/s
I am happy to report that these changes were merged into the main line release at the raas/mbw github page. So if you are going to use mbw for benchmarking your memory throughput I highly recommend you use the new 1.3.0 version.
If you have a multi-cpu system and want to see what your total average throughput is you can use this script below. It will detect how many processors you have and spawn the matching number of mbw instances. It will then sum up the average measurements. Feel free to modify it as needed.
#! /usr/bin/env bash
# This will run an mbw instance for each core on the machine

NUMCORES=$(grep "processor" /proc/cpuinfo | wc -l)
TMP="/tmp/mbw_result_tmp"

echo "Starting test on $NUMCORES cores"
for (( i=0; i<$NUMCORES; i++ )); do
   mbw -b 4096 32 -n 100 > ${TMP}_${i} &
done

echo "Waiting for tests to finish"
wait

MEMCPY_RESULTS=()
DUMB_RESULTS=()
MCBLOCK_RESULTS=()

for (( i=0; i<$NUMCORES; i++ )); do
   MEMCPY_RESULTS[$i]=`grep -E "AVG.*MEMCPY" ${TMP}_${i} | \
      tr "[:blank:]" " " | cut -d " " -f 9`

   DUMB_RESULTS[$i]=`grep -E "AVG.*DUMB" ${TMP}_${i} | \
      tr "[:blank:]" " " | cut -d " " -f 9`

   MCBLOCK_RESULTS[$i]=`grep -E "AVG.*MCBLOCK" ${TMP}_${i} | \
      tr "[:blank:]" " " | cut -d " " -f 9`
done

MEMCPY_SUM=0
DUMB_SUM=0
MCBLOCK_SUM=0

# Need to use `bc` because of floating point numbers
for (( i=0; i<$NUMCORES; i++ )); do
   MEMCPY_SUM=`echo "$MEMCPY_SUM + ${MEMCPY_RESULTS[$i]}" | bc -q`
   DUMB_SUM=`echo "$DUMB_SUM + ${DUMB_RESULTS[$i]}" | bc -q`
   MCBLOCK_SUM=`echo "$MCBLOCK_SUM + ${MCBLOCK_RESULTS[$i]}" | bc -q`
done

echo "MEMCPY Total AVG: $MEMCPY_SUM MiB/s"
echo "DUMB Total AVG: $DUMB_SUM MiB/s"
echo "MCBLOCK Total AVG: $MCBLOCK_SUM MiB/s"
Using the 1.3.0 version of mbw, as well as some good old fashion detective work, we were able to find the perfect combination of software and hardware optimizations to push our product to the next level. It is still in early beta, but hopefully in a few months it will be finalized and I can release more details!
In Part 1 of using Zenity we covered some pretty cool GUI components that can be used from a shell script. This time we will be finishing up with some examples of how to integrate some more complex gtk+ widgets into your script.
One of the most fundamental outputs any long running script should produce is some form of progress. Everyone loves a well tuned, accurate progress bar! Conversely, everyone hates a progress bar that goes to 99% immediately and sits there for 10 minutes. Getting a progress bar perfect is an art in and of itself, but that’s not really the point of this tutorial. I’m just going to show you how a Zenity progress bar works.
The Zenity progress bar is activated through the --progress flag. The progress bar is different from the other components because it actively listens on standard in for progress and text to display. Any text you want displayed above the progress bar must begin with a ’#’ character. Any number that is written to standard out is assumed to be the progress. As you can see in the example below, before I copy a file, I echo the file name with a ’#’ character before it. Then I perform the copy operation, and update the percentage. The output of the entire for loop is piped to the progress bar.
#! /usr/bin/env bash

##
# This script will copy all of the specified files to the destination
# usage ./copy.sh file1 file2 ... fileN destination/
#

numberOfArgs=$#

if [ $numberOfArgs -le 0 ]; then
    echo "Usage: ./copy.sh file1 file2 ... fileN destination/" >&2
    exit 1
elif [ $numberOfArgs -le 1 ]; then
    echo "You must specify a destination" >&2
    exit 1
fi

destination=${@: -1}

for (( i=1; i<$numberOfArgs; i++ )); do
    echo "# ${1}"
    cp "${1}" "$destination"
    echo "$(( (i * 100) /numberOfArgs ))"
    sleep 0.5  #So that you can see the items being copied
    shift 1
done | zenity --progress --title="Copy files to $destination" --percentage=0

if [ "$?" -eq 1 ]; then
    zenity --error --text="Copy Aborted"
    exit 1
fi
If you are unsure how long an operation will take, but want to display text on a progress bar you can use the --pulsate option. The pulsate option will just move a bar back and forth until end-of-file is read from standard in. To see it’s effect on your distribution run this simple command. (on Unity it just sits empty. How boring!)
$ ( sleep 5; echo "# done" ) | zenity --progress --pulsate \
   --title="Long operation" --text="Doing lots of stuff"
Another more advanced GUI widget that Zenity has to offer is the list dialog. The list dialog is activated by the --list flag and has quite a few options to control it’s behavior. To specify the names of the columns you can use the --column="name" flag as many times as you need. Each flag will add another column to the list display. Once you have all of the columns set up you can start adding content. To do this just add space separated values.
$ zenity --list --title="Shopping list" --column="Items" --column="Quantity" \
   "Bread" 1 \
   "Chicken" 2 \
   "Iced tea mix" 1 \
   "Apples" 6
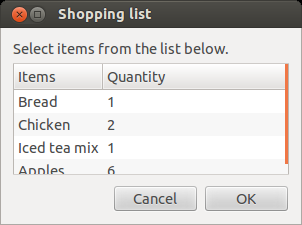
Lists are great for displaying two dimensional data, like a database table. In this example I will read the data from a sqlite3 database called test.db that has a single table called memos. I then use Zenity to display the data in a nice tabular form.
#! /usr/bin/env bash
#Read from a sqlite3 database and build a zenity list
#to represent the table

command='--list --title="Database memos" '
header=`sqlite -header -list test.db 'select * from memos;' | head -n 1`

IFS='|' read -a columns <<< "$header"

for col in ${columns[@]}; do
   command="$command --column=\"$col\" "
done

command="$command $(sqlite -csv test.db 'select * from memos;' | tr ',' ' ') "

echo "$command" | tr '\n' ' ' | xargs zenity
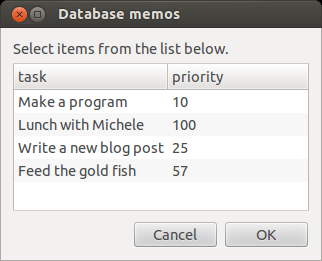
Each row in the table can also be made editable with the --editable flag. By doing this, the changed rows are sent back to standard out when the okay button is pressed. Although this may seem like a great feature, it is harder to work with in practice. Zenity only prints the fist column of the changed row by default after you hit okay. This can make it hard for a script to know what was actually edited. In order to figure out which row is being edited I suggest using some sort of key in the first column, and to use the --print-column=ALL flag to get the entire row. However if the user edits the key column of a row, you’re going to have a bad time!
The final Zenity widget I am going to cover is the scale slider. Scale sliders are great for getting a numeric value from an arbitrary range of values. The scale can be used with the --scale flag. You can set the initial value, minimum value, maximum value, and step size with the --value, --min-value, --max-value, and --step respectively. The default values for each of those flags respectively are 0, 0, 100, and 1. You can also enable the scale to output the value to standard out on every change instead of just the final value using the --print-partial flag.
$ zenity --scale --min-value=0 --max-value=255 --text="Please select red saturation"
This completes our tour of Zenity. As you can see Zenity provides a great utility for making bash scripts more approachable to users who might not be aware of, or comfortable with using the command line. Feel free to try, or modify any of the examples I have given and build a nice GUI application with a bash script.
“The Hand of Thief Trojan”
2013-08-29
Recently there was an announcement about a trojan program that targets Linux machines. It is a pretty impressive piece of software! It has the ability to detect if it is running in a virtual environment, or a chroot environment. The main payload of the trojan is a browser form grabber (thread bbb), and a connection to a command and control server (thread aaa).
Another cool feature is the ability to detect if any monitoring software is being used and stop its outgoing internet traffic. It looks for wireshark and tcpdump. All in all this is a pretty nice piece of malware! You can read more about it on this blog.
So the next thought might be, how do I know if I have this? Well, I got you covered! The sha256 sums for each of the components have been released. Also this trojan replaces the kernel flush-8:0 daemon with an infected version that can be detected. So, I have prepared a script that will scan for the various files, and bad flush-8:0 process.
#! /usr/bin/env bash

#Copyright (c) 2013 James Slocum

#Permission is hereby granted, free of charge, to any person obtaining a copy
#of this software and associated documentation files (the "Software"), to deal
#in the Software without restriction, including without limitation the rights
#to use, copy, modify, merge, publish, distribute, sublicense, and/or sell
#copies of the Software, and to permit persons to whom the Software is
#furnished to do so, subject to the following conditions:

#The above copyright notice and this permission notice shall be included in
#all copies or substantial portions of the Software.

#THE SOFTWARE IS PROVIDED "AS IS", WITHOUT WARRANTY OF ANY KIND, EXPRESS OR
#IMPLIED, INCLUDING BUT NOT LIMITED TO THE WARRANTIES OF MERCHANTABILITY,
#FITNESS FOR A PARTICULAR PURPOSE AND NONINFRINGEMENT. IN NO EVENT SHALL THE
#AUTHORS OR COPYRIGHT HOLDERS BE LIABLE FOR ANY CLAIM, DAMAGES OR OTHER
#LIABILITY, WHETHER IN AN ACTION OF CONTRACT, TORT OR OTHERWISE, ARISING FROM,
#OUT OF OR IN CONNECTION WITH THE SOFTWARE OR THE USE OR OTHER DEALINGS IN
#THE SOFTWARE.

# This script is designed to scan all executables on the system and look
# for the hand of thief trojan by checking the published sha256 checksums
# as well as look for the startup file it creates

exec 3>&1
exec 1>output.log
exec 2>error.log

# HOT initial binary, HOT shared object, HOT backdoor executable, HOT formgrabber
# HOT backconnect script
hashes=("BD92CE74844B1DDFDD1B61EAC86ABE7140D38EEDF9C1B06FB7FBF446F6830391"
        "2ACF2BC72A2095A29BB4C02E3CD95D12E3B4F59D2E7391D9BCBBA9F3142B40AE"
        "753DC7CD036BDBAC772A90FB3478B3CCF22BEC70EE4BD2F55DEC2041E9482017"
        "B794CE9E7291FE822B0E1F1804BD5A9A2EFC304A1E2870699C60EF5083C7BAC2"
        "4B0CC15B24E38EC14E6D044583992626DD8C72A4255B9614BE46B1B4EEFA41D7")

badfilecount=0

sha256() {
   sha256sum "$1" | cut -d " " -f 1 | tr '[:lower:]' '[:upper:]'
}

##
# A known version of HOT starts a fake version of flush-8:0 from init instead of
# the kernel process [kthread]. This will detect that.
# https://www.circl.lu/pub/tr-15/
scan_for_hand_of_thief_process() {
   if [[ $(ps -eaf | grep "\[flush" | tr -s " "  | cut -d " " -f 3 | grep ^1$) ]]; then
      echo "!!! Infection suspected !!!" >&3
   else
      echo "No infection suspected" >&3
   fi
}

scan_file(){
   local filename="$1"
   local sha256=$(sha256 "$filename")

   for hash in ${hashes[@]}; do
      if [ "$sha256" = "$hash" ]; then
         printf "$filename !!! FAILED !!!\n" >&3
         return 1
      fi
   done
   return 0
}

scan() {
   local dirname="$1"
   local result=0
   for file in `ls -A1`; do
      if [ -d "$file" -a ! -L "$file" ]; then
         pushd "$file"
         scan "${dirname}${file}/"
         popd
      elif [ -x "$file" -a ! -d "$file" ]; then
         scan_file "$file"
         result=$?
      elif [[ "$file" =~ .*\.so.* ]]; then
         scan_file "$file"
         result=$?
      else
         result=0
      fi

      if [ $result -eq 1 ]; then
         (( badfilecount++ ))
      elif [ $result -eq 2 ]; then
         (( suspectfilecount++ ))
      fi
   done
}

if [ $# -lt 1 ]; then
   echo "Please specify a directory or file to scan." >&3
   exit 1
fi

echo "Scanning for \"Hand of thief\" trojan" >&3
scan_for_hand_of_thief_process
pushd "$1"
echo "Deep scanning files" >&3
scan
popd
echo -e "\nScan complete:" >&3
echo "Infected files: $badfilecount" >&3
echo "" >&3
Please feel free to use this script to detect if you have been infected by the trojan. Of course it is important to note that this is a trojan and not a worm. The difference is that you would have had to run the “dropper” application yourself with root permissions. So if you haven’t run any mystery software with the sudo command lately, then chances are you don’t have an infection.
$ ./scanner.sh /usr/bin
Scanning for "Hand of thief" trojan
No infection suspected
Deep scanning files

Scan complete:
Infected files: 0
Please let me know in the comments if you find any issues with the script and I will be happy to update it! Until then, stay safe and don’t run any mystery executables with root permissions.
As any developer knows, reading and writing to the terminal (via stdin and stdout) are basic skills required to perform even the most fundamental programming task. Every language has their own functions (or methods) to print to, and read text from the terminal. In bash, the fundamental ways to do this are with the echo and read commands.
#! /usr/bin/env bash

random="$(( (RANDOM % 16) + 1 ))"
guess="0"

echo "Guess a number between 1 - 16"
while [ $guess -ne $random ]; do
   read -p "Guess > " guess

   if [ $guess -lt $random ]; then
      echo "Too low!"
   elif [ $guess -gt $random ]; then
      echo "Too high!"
   fi
done

echo "Correct!"
This simple example shows the use of both the echo and read commands. But what if we want to interact with a user that might not be familiar with the command line? For example both my wife and her sister have Linux computers, but neither know what the command line is. Many Apple users are in the same boat. Just because the resource is there, does not mean people will use it. So how do we write scripts that non-cli users can access?
In comes zenity! Zenity is a command line tool that will display gtk+ dialogs. There is a huge list of default dialogs available from calendars to progress bars. Zenity is available on Linux, Windows, and BSD Unix. OSX does support the GTK+ library, but I did not find a port of Zenity in the brew repository. Perhaps this would be a good project down the road…
Lets begin this tour with some simple dialogs that can be used in the place of echo. Zenity has four main dialog types, error, info, question, and warning. Each dialog can take a --text switch to set what the dialog will say, --title to set the title of the window, --width, and --height to control the window size.
zenity --info --title "info dialog" --text='Something needs your attention!'
zenity --error --title "error dialog" --text='Something went wrong!'
zenity --warning --title "warning dialog" --text='Something might be wrong!'
zenity --question --title "question dialog" --text='Are you going to take action?'
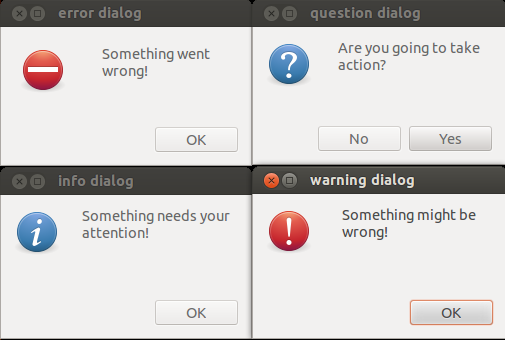
As you can see, it is very simple to get GUI (graphical user interface) dialogs up and running quickly from the command line. What happens if you need to a user to select a date? Zenity has you covered with the --calendar flag. If you want to set a specific initial date to show you can use the --year --month and --day flags. When the user has selected the date and hit the okay button, the date is returned on standard out in the form MM/DD/YYYY. If you want to change this format, you can use the --date-format flag and pass in any strftime() style string. See the strftime reference page for details.
$ zenity --calendar --year 1969 --month 12 --day 28 --text "Linus Torvalds birthday"
12/28/1969

$ zenity --calendar --text "Please select your birthday" --date-format="%A, %B %d %G"
Tuesday, June 25 2013
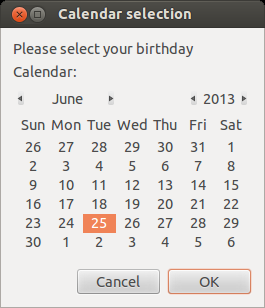
At this point you might be wondering, “How can I tell if a user presses cancel?”. It’s easy! You simply need to check the return code (echo $?). A 0 return code means the user selected okay. This is usually accompanied by what ever info you were trying to get from the user. A return code of 1 indicates the user pressed cancel, and a return code of 5 indicates a timeout has occurred. To set a timeout on a dialog you can use the --timeout flag.
zenity --question --text "Hey, you there?" --timeout=5
Have you ever needed a user to select a color from a shell script? Yeah… me neither, but with Zenity it is easy if the need ever arises!
$ zenity --color-selection --show-palette
#4d4db4b45757
Important: The color code returned from Zenity is a gtk+ six byte color code. Each 2 byte pair represent an intensity value from 0 - 65535. HTML color codes are three bytes and each byte represents an intensity value from 0 - 255. So to convert these numbers you will need to scale the values.
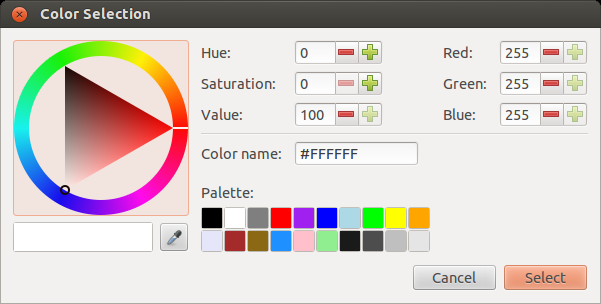
While a developer may never need the user to select a color from a shell script, they most certanly will need a user to select a file at some point. Zenity has a really nice file selector dialog that can be used.
zenity --file-selection
There are a lot of options to help you control how many and what types of files are selectable. Using the --multiple option will allow the user to select as many files as they want. The --directory option limits the user to only selecting directories. If you only want the user to select a specific kind of file, like an image, you can specify a file filter using --file-filter. This can also be used as a save dialog using the --save flag.
# Save dialog limiting the user to only saving 'gif' files
$ zenity --file-selection --file-filter=*.gif --save

# Allow selection of multiple image files limited to 'gif', 'jpg',
# and 'jpeg' extensions
$ zenity --file-selection --multiple --file-filter='*.gif *.jpeg *.jpg'

# Allow selection of only one type of file at a time
$ zenity --file-selection --file-filter="*.gif" \
   --file-filter="*.jpg" \
   --file-filter="*.jpeg"
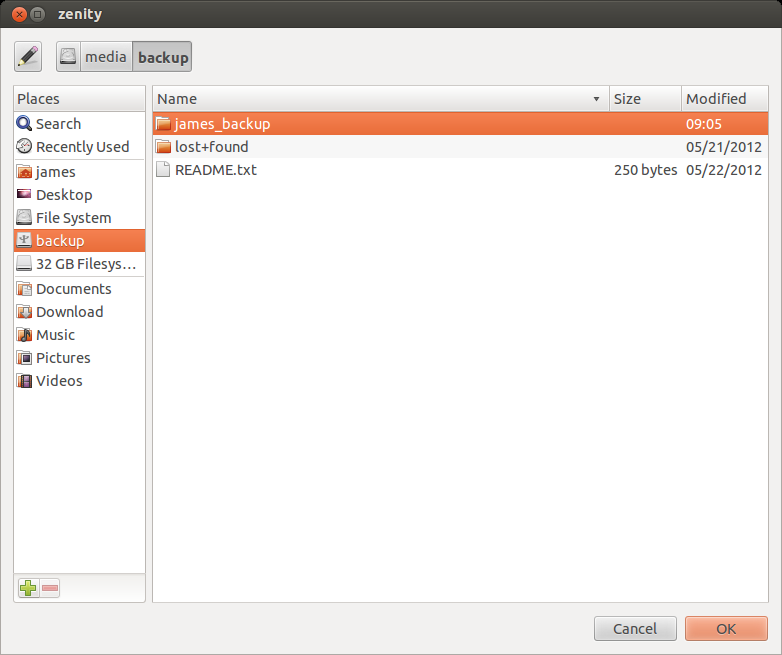
Multi-entry forms are also easy to build using Zenity. A form can be built using text fields, password fields, and calendars. Text fields can be added with the --add-entry flag. Password fields are added with the --add-password flag, and calandars are added with the --add-calendar flag.
$ zenity --forms --title="Create user" --text="Add new user" \
   --add-entry="First Name" \
   --add-entry="Last Name" \
   --add-entry="Username" \
   --add-password="Password" \
   --add-password="Confirm Password" \
   --add-calendar="Expires"
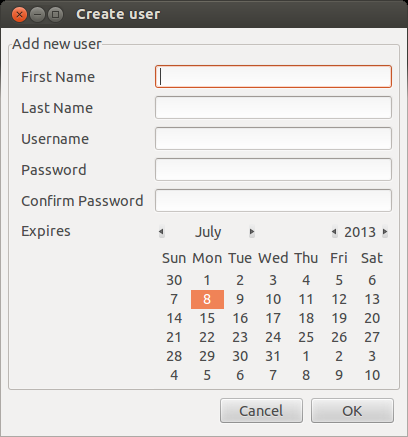
This concludes part 1 of our tour, Next time I will talk about displaying tabular data with the --list option, and showing the progress of a long running task with a GUI progress bar using --progress
This is the final stop on our tour of the lesser known coreutils. If you haven’t already done so, you should read part 1 and part 2 first. Once again let’s dive in with some cool commands!
mktemp
mktemp will create a temporary file or directory with a unique name. You can also pass in a template and it will safely create a file with a unique name matching it. The template must contain at least 3 ‘X’ characters, but can contain more. The more X characters you use, the more random characters will appear in the name. If you just run the command with no arguments it will use /tmp as the default location and the template tmp.XXXXXXXXXX. If you specify only a template, the file will be created in the current working directory.
$ mktemp
/tmp/tmp.FDxW98zfqW

$ mktemp sometemp.XXXXXXXXXX
sometemp.nlk4ihtGic

$ mktemp --tmpdir=/tmp mytemp.XXXXXXXX
/tmp/mytemp.ys6mtKKT
As you can see, the command will output the name of the of the temporary file it has just created. You can easily capture this in a shell script using a variable and a command substitution.
$ TEMPDIR="$(mktemp)"
$ echo $TEMPDIR
/tmp/tmp.eMspLL5dWc

$ echo "Hello" > $TEMPDIR
$ cat $TEMPDIR
Hello
Combining mktemp with unlink can create a way to write data to a file without anyone being able to read it externally. The unlink command will remove the file name from the file system, but if there are still open streams the data on disk remains intact until those streams are closed. The key is to use the exec command to open file descriptors (streams) to the file before unlinking it.
$ TEMPDIR="$(mktemp --tmpdir=/tmp mytemp.XXXXXXXX)"
$ exec 5>$TEMPDIR
$ exec 6<$TEMPDIR
$ echo "Hello to file descriptor" >&5
$ cat $TEMPDIR
Hello to file descriptor

$ unlink $TEMPDIR
$ cat $TEMPDIR
cat: /tmp/mytemp.M1kjasnR: No such file or directory

$ echo "Hello to file descriptor after unlink" >&5
$ cat <&6
Hello to file descriptor after unlink
After you unlink the file, the two descriptors becomes like a named pipe. Anything you write to fd 5 will be stored until it is read from fd 6. If you try to cat from fd 6 twice in a row, the second read will not return anything, as it was consumed by the first read. This is the best way to store “secret” data in a script without worrying about nosy users peeking at the file.
touch
touch is a command that I am sure most Linux and Unix users are aware of. When used with a file name, it will create an empty file if the file does not exist. If the file does exist, it will update the last accessed and last modified timestamps.
$ ls -la
-rw-rw-r--  1 james james   897 Dec 17 14:49 dart_blog_part_4.html

$ touch dart_blog_part_4.html
$ ls -la
-rw-rw-r-- 1 james james 897 Jun 14 07:32 dart_blog_part_4.html
The reason I bring this up is because of the lesser known options that let you mess with the timestamps of the file. You can change a file to have any timestamp you want, in the future or the past.
# use -t option to set a specific date
$ touch -t 400006091148.12 dart_blog_part_4.html
-rw-rw-r--  1 james james   897 Jun  9  4000 dart_blog_part_4.html

# use -d or --date to set a specific date with a date string
$ touch -d "next tuesday" dart_blog_part_4.html
-rw-rw-r--  1 james james   897 Jun 18  2013 dart_blog_part_4.html

# use the timestamp of a different file
$ ls -la
-rw-rw-r--  1 james james   897 Jun 18  2013 dart_blog_part_4.html
-rw-rw-r--  1 james james   661 Jan 10 14:00 linux_journal_blog.html

$ touch -r linux_journal_blog.html dart_blog_part_4.html
-rw-rw-r--  1 james james   897 Jan 10 14:00 dart_blog_part_4.html
-rw-rw-r--  1 james james   661 Jan 10 14:00 linux_journal_blog.html
ptx
ptx is another one of those interesting tools that I would catalog with tsort (See part 2). It is a very specialized command. It will produce a permuted index, including context, of the words in an input file. Of course it is better shown then described.
$ cat test.txt
Roses are red
Violets are blue
Chocolate is sweet
and so are you

$ ptx test.txt
   Roses are red Violets are blue   Chocolate is sweet and so are you
Chocolate is sweet and so/          Roses are red Violets are blue
sweet and so/       Roses are red   Violets are blue Chocolate is
      are blue Chocolate is sweet   and so are you      /are red Violets
is sweet and so are/        Roses   are red Violets are blue Chocolate
are/        Roses are red Violets   are blue Chocolate is sweet and so
   blue Chocolate is sweet and so   are you                 /Violets are
        Roses are red Violets are   blue Chocolate is sweet and so are/
   red Violets are blue Chocolate   is sweet and so are you         /are
sweet and so are/       Roses are   red Violets are blue Chocolate is
  are blue Chocolate is sweet and   so are you              /red Violets
    Violets are blue Chocolate is   sweet and so are you        /are red
    Chocolate is sweet and so are   you                        /are blue
Now it should be a bit more clear. The words to the right of the break in the center are sorted in alphabetical order. Each word is printed the same number of times it appears in the file, and each word is shown with its surrounding context. There are some options to change how the output is displayed, or to isolate specific words.
# ignore case when sorting, and break on end of line
$ ptx --ignore-case -S "\n" test.txt
                                 and so are you
                         Roses   are red
                       Violets   are blue
                        and so   are you
                   Violets are   blue
                                 Chocolate is sweet
                     Chocolate   is sweet
                     Roses are   red
                                 Roses are red
                           and   so are you
                  Chocolate is   sweet
                                 Violets are blue
                    and so are   you

# same as above, and print only those lines with "are" in them
$ ptx --ignore-case -S "\n" -W "are" test.txt
                         Roses   are red
                       Violets   are blue
                        and so   are you
pr
pr can be used to paginate or columnate a text file to prepare it for printing. Basically it will read a plain text file in and add a header, footer, and page breaks. It can also be used to format the plain text file like a magazine article (2 column style). Honestly it does do a nice job, however the 2 column style is a bit quirky.
# Show the first 10 lines of the plain text file
$ head -10 dart.txt
Dart - A new web programming experience
James Slocum

[Section: Introduction]
JavaScript has had a long standing monopoly on client side web programming.
It has a tremendously large user base and countless libraries have been
written in it.  Surely it is the perfect language with no flaws at all!
Unfortunately, this is simply not the case. JavaScript is not without its
problems, and there exists a large number of libraries and "trans-pilers"
that attempt to work around JavaScripts more quirky behaviors. JQuery,

# Format it with pr, and show the first 10 lines
$ pr -h "Dart - A new web programming experience" dart.txt | head -10


2013-02-28 10:19     Dart - A new web programming experience      Page 1


Dart - A new web programming experience
James Slocum

[Section: Introduction]
JavaScript has had a long standing monopoly on client side web programming.
As you can see in this example, pr has added the requested header info, as well as page numbers and a date. There are a ton of flags to control different header, footer, and page formatting options. One of the strange things about the columnate -COLUMN --columns=NUM behavior is that it truncates the lines instead of reformatting them.
# You can see that it just chops off the end of the line
# instead of wrapping it
$ pr -2 -h "Dart - A new web programming experience" dart.txt | head -10


2013-02-28 10:19     Dart - A new web programming experience      Page 1


Dart - A new web programming experi defined with the class keyword. Eve
James Slocum                        and all classes descend from the Ob
                                    single inheritance. The extends key
[Section: Introduction]             other than Object. Abstract classes
JavaScript has had a long standing  some default implementation. They c
It’s a good thing that we already have a tool to help us with this! We can combine the fmt utility and pr to generate cleaner 2 column text. We simply need to restrict the original text to 35 characters per line.
$ fmt -w 35 dart.txt | pr -2 -h "Dart - A new ... " | head -10


2013-06-12 10:14     Dart - A new web programming experience      Page 1


Dart - A new web programming        going to need to grab a copy
experience James Slocum             from dartlang.org. I personally
                                    chose to install only the SDK;
[Section: Introduction] JavaScript  however, there is an option to
has had a long standing monopoly    grab the full Dart integrated
Now we can clearly see that the columns are wrapping correctly. Now I know most of you might be thinking “Who writes with just plain text? Why is this still a thing?”. Well actually I still write a lot in plain text! Vim is my main editor for everything, not just code. So it makes sense to do all of my writing in plain text. If I need to format the text for publications, it is easy to use tools like LaTeX (pronounced lay-tek) or simply copy and paste it into OpenOffice. In fact plain text is the only format pretty much guaranteed to exist and be supported for as long as there are computers.
nl
nl prints out the contents of a file with the lines numbered. cat --number does the same thing, but nl has a ton more options. With nl you can control the style and format of the output. Want to only number lines that match a basic regex? No problem with the -b p<regex> flag.
# number all lines (including blanks)
$ nl -b a test.txt
     1  Roses are red
     2  Violets are blue
     3  Chocolate is sweet
     4  and so are you
     5
     6  Roses are the prettiest flower
     7  but I like potatoes more
     8  they will grow eyes
     9  even in a dark drawer

# number only those lines with the word Roses
$ nl -b pRoses test.txt
     1  Roses are red
       Violets are blue
       Chocolate is sweet
       and so are you

     2  Roses are the prettiest flower
       but I like potatoes more
       they will grow eyes
       even in a dark drawer
You will have to excuse the bad poetry, as I just needed some simple test content. As you can see the nl utility has a lot of great options to help number the lines in a file.
split, csplit
split can be used to either split a text file into several files based on lines, or a binary file into pieces based on size. This is a great tool for working around the size limitations on email attachments. The two most useful flags for working with binary files are the -b --bytes flags which allows you to specify the size of each partial file, and the -n --number flags which allow you to specify how many partial files you want. You only use one or the other.
$ du -h VIDEO.ts
107M    VIDEO.ts

$ split -b 10M VIDEO.ts VIDEO_part_
$ du -h *
10M     VIDEO_part_aa
10M     VIDEO_part_ab
10M     VIDEO_part_ac
10M     VIDEO_part_ad
10M     VIDEO_part_ae
10M     VIDEO_part_af
10M     VIDEO_part_ag
10M     VIDEO_part_ah
10M     VIDEO_part_ai
10M     VIDEO_part_aj
6.3M    VIDEO_part_ak
To reassemble the files, simply cat them back together and redirect the output to the file name you want.
csplit works a bit differently, csplit is used to split a file based on a “context line.” The context line can be specified as regular expression pattern.
# This will copy up to but not including the lines with 'Roses'
$ csplit test.txt /Roses/ {*}
0
66
99

$ ls
xx00
xx01
xx02
test.txt

$ cat xx00

$ cat xx01
Roses are red
Violets are blue
Chocolate is sweet
and so are you

$ cat xx02
Roses are the prettiest flower
but I like potatoes more
they will grow eyes
even in a dark drawer
The 'xx’ prefix is configurable with the -f --prefix=PREFIX flags. So if you want to give each part a more usable name, it’s not a problem. The suffix (the numbers in this case) is also settable with the -b --suffix-format=FORMAT flags. Any printf() format can be passed in. See this page for more details on that.
seq
seq will generate a sequence of numbers and print them to standard out. There are three ways to execute this command. The first is just with the final number N. This will produce a sequence from 1-N. The next way is to provide a start S and final N. This will produce a sequence S-N. The last way is to provide a start S, final N, and an increment I. This will produce a sequence S-N, incrementing by I each time.
$ seq 5
1
2
3
4
5

$ seq 0 5
0
1
2
3
4
5

$ seq 0 2 5
0
2
4
seq is rarely used directly and is instead used as part of a command chain or a shell script loop.
# use seq as a counter in a loop to find prime numbers
for i in $(seq 0 15); do
   if [ $(factor $i | cut -d : -f 2 | wc -w) -eq 1 ]; then
      echo "$i is prime"
   fi
done

# Use seq and shuf to generate a pick 6 quick pick
$ seq 1 49 | shuf | head -6 | sort -n | xargs printf "%d,%d,%d,%d,%d,%d\n"
2,18,28,33,43,48
timeout
timeout is an awesome command when you need to put an upper limit on the amount of time a program should/can run. You can tell if a command timed out by the return value. A return of 124 indicates that the command timed out. 125 is returned if timeout fails, 126 is if the command cannot be run, and 127 if the command cannot be found. If the command runs successfully it will return the normal command exit status. You can check the return status with the command echo $?.
# cat will wait forever for input when invoked without a file
# use timeout force cat to only run for 5 seconds
$ timeout 5 cat

# This is useful in scripts if you want data from the Internet
# but don't want to hang forever
$ timeout 5 curl http://jamesslocum.com
timeout also has the -s --signal flags to allow you to control what signal gets sent to the process. The default signal is 15 or TERM. You can change it to 9 or KILL to guarantee a process dies and does not catch or ignore the signal.
Links and further reading
This concludes my tour of the lesser known coreutils. Of course there are dozens of more “well known” coreutils that you can read up on. I highly recommend reading the man pages and info pages as well.
Wikipedia coreutils page
GNU coreutils Documentation
Bash Cookbook (Amazon link)
In part 1 I introduced 6 of the lesser known core utilities. One thing I forgot to mention is that OSX prefixes all of the coreutil commands with the letter ‘g’. So head is ghead on a Mac. With that out of the way let’s keep the momentum going and dive right in with more commands!
factor
factor will perform a prime number factorization on the input number. You can either specify the number you want to factor on the command line after the factor command, or you can just execute the command and keep typing numbers onto the command line. To exit, just hit CTRL+d.
$ factor 5234
5234: 2 2617

$ factor
52893
52893: 3 3 3 3 653
1234567891234567891234567898
factor: `1234567891234567891234567898' is too large
factor can be built with or without the gmp library. gmp is the GNU Multiple Precision library. It is a “big number” library that can handle precisions greater than what the native processor can handle (in my case 64 bit). The default version that comes with Ubuntu Linux is not built with gmp, and therefore limited in the size of the number it can decompose.
To get around this limitation, you can install the gmp library (either from the apt archive, or from source) and recompile the coreutils package from source. Once you have re-compiled it you can replace the old factor with the new one, or name it something else and put it side by side with the old one.
$ echo "2^128-1" | bc | factor
factor: `340282366920938463463374607431768211455' is too large

# I recompiled the coreutils with gmp, and created big-factor
$ echo "2^128-1" | bc | big-factor
340282366920938463463374607431768211455: 3 5 17 257 641 65537 274177 6700417 67280421310721
On FreeBSD, when you install the coreutils you will be prompted to link against the gmp libraries. If you choose that option it will install the library for you, then build the coreutils with the proper linkage.
Fedora Linux users are lucky, as the default version of factor is built with gmp support.
If you are using OSX, remember that all of the coreutils commands installed by brew are prefixed with a letter 'g’. You can either run gfactor, or create an alias.
alias factor=/usr/local/bin/gfactor
To make this permanent you should add this alias to your .bash_profile. Also, the default brew script builds coreutils without gmp support. To remedy this you must edit the script and change the line that says --without-gmp to --with-gmp. You must also have gmp installed. Just follow these steps.
$ brew install gmp
$ brew edit coreutils

#edit the line that says --without-gmp to --with-gmp (line 14 for me)
$ brew install coreutils

#alternatively you could use 'brew reinstall coreutils'

#confirm that gfactor is linked to gmp
$ otool -L /usr/local/bin/gfactor
/usr/local/bin/gfactor:
   /usr/local/lib/libgmp.10.dylib
   /usr/lib/libiconv.2.dylib
   /usr/lib/libSystem.B.dylib
base64
base64 is a simple, but very useful program that allows you to encode files into base64 text, and decode base64 text back into files. By default, it will print the encoded base64 text to standard out, so you will need to redirect it to a file if you want to save it.
base64 hyphen.jpg
/9j/4AAQSkZJRgABAgEBkAGQAAD/4QBoRXhpZgAATU0AKgAAAAgABQESAAMAAAABAAEAAAEaAAUA
AAABAAAASgEbAAUAAAABAAAAUgEoAAMAAAABAAIAAIdpAAQAAAABAAAAWgAAAAAAAAGQAAAAAQAA
AZAAAAABAAAAAAAA/+0UylBob3Rvc2hvcCAzLjAAOEJJTQPtClJlc29sdXRpb24AAAAAEAGQAAAA
AQABAZAAAAABAAE4QklNBA0YRlggR2xvYmFsIExpZ2h0aW5nIEFuZ2xlAAAAAAQAAAAeOEJJTQQZ
EkZYIEdsb2JhbCBBbHRpdHVkZQAAAAAEAAAAHjhCSU0D8wtQcmludCBGbGFncwAAAAkAAAAAAAAA
AAEAOEJJTQQKDkNvcHlyaWdodCBGbGFnAAAAAAEAADhCSU0nEBRKYXBhbmVzZSBQcmludCBGbGFn
cwAAAAAKAAEAAAAAAAAAAjhCSU0D9RdDb2xvciBIYWxmdG9uZSBTZXR0aW5ncwAAAEgAL2ZmAAEA
...
...
kzT4Htaf89P+acVU4Y/yb/SlqYJYxfiRfqwQT7vX4eicOuKvTcVf/9k=
Using base64 can be a clever way to get around attachment limitations placed on email, or to embed a program or other files into a script. I have used this method in my packup.sh script that can be found on my github page.
On FreeBSD you must install base64 separately from the coreutils. The base64 package is in /usr/ports/converters/base64. You can install the base64 package from there by running make install as root.
On OSX the base64 package comes packaged with the openssl utilities. Although the binary is different from the GNU version, it still functions mostly the same. The difference is the flags that the command takes. The GNU version uses the ’-d’ flag for decoding, while the openssl version uses ’-D’. The GNU version also has a ’-i’ flag to ignore newline characters, the openssl version does not. To use the GNU version of base64 you can run the gbase64 command.
truncate
truncate can be used to adjust the size of a file. If you make a file smaller, it will chop the data off the end, and if you make it bigger, it will produce a hole. A hole is a null byte filled section of a file that does not actually get stored on the disk. It is transparently stored as meta-data to save space in the file system.
# Create and list size of empty file
$ touch empty.file
$ ls -las empty.file
0 -rw-rw-r-- 1 james james 0 Apr 19 21:03 empty.file

# set the size to 100 Megs and list it again
$ truncate -s 100M empty.file
$ ls -las empty.file
0 -rw-rw-r-- 1 james james 104857600 Apr 19 21:04 empty.file
Notice above that the reported size of the file has increased to 104857600 bytes, but the number of blocks (the first number) is still 0. Thats because this file still takes no space on the physical storage medium, despite reporting it’s size as 100 Megs. The file is just one big hole.
If you are using OSX, you can run the truncate program by running the gtruncate command.
tsort
tsort is one of the stranger core utilities because it is so specialized. tsort will perform a topological sort (or topsort) on it’s input. A topological sort is used on directed graphs. For every directed edge uv from vertex u to vertex v, u comes before v in the ordering. One use of this algorithm is to determine the order tasks should be performed to avoid any conflicts. Lets take a look at a simple example.
now, we can enter each uv directed edge into tsort, and it will output the order in which to perform these tasks.
$ tsort <<-EOF
> take_a_shower make_shopping_list
> take_a_shower go_to_bank
> take_a_shower get_hair_cut
> go_to_bank go_to_store
> go_to_store buy_food
> buy_food cook_dinner
> go_to_bank get_car_wash
> go_to_bank get_hair_cut
> make_shopping_list buy_food
> EOF
take_a_shower
go_to_bank
make_shopping_list
get_hair_cut
get_car_wash
go_to_store
buy_food
cook_dinner
OSX comes with its own version of tsort. The GNU version and the default version behave identically so you can use either. If you want to use the GNU version from the coreutils package, use the gtsort command.
Next time I will wrap up the series with a few more useful commands. Ever need to make it look like a file was created in the year 4000? Check back for part 3 to find out how!
The GNU coreutils are a set of tools that come with every flavor of Linux. They are a useful and historical part of the Unix and Linux operating systems and you use them everyday without realizing. Commands like ls, cat, and rm are all part of the coreutils package. However there are a large number of lesser known and lesser used tools in the coreutils. I will go over some of them that I have found very useful.
The GNU coreutils are not just available for Linux. You can install them on OSX, BSD Unix, and Windows as well. In OSX, you can use brew install coreutils to install it (you must have homebrew installed). On windows you can either install cygwin , or gnuwin32. On FreeBSD you will need to have the ports collection installed. The coreutils port is in /usr/ports/sysutils/coreutils. Of course for the really brave you can always compile it from source.
Once you have the coreutils installed you can begin experimenting with some of the new commands and see what they do. The complete documentation of all the coretuils can be found at the GNU documentation page. Average Linux and Unix users will find they know most of the commands, and use them on a daily basis. However there are quite a few gems that most users probably didn’t know were there. Let’s take a look at a few.
Note: These examples are geared toward the GNU versions available on Linux. Other versions of these commands might have different options or slight incompatibilities.
expand, unexpand
expand and unexpand are a fantastic pair of tools if you ever work on code with another developer that uses a different spacing in their editor than you (like tabs instead of 2 spaces). expand will read a file and convert tab characters to the requested number of spaces. This is great for a language like Python that is dependent on a consistent spacing being used or it won’t run. unexpand does the opposite and converts the specified number of spaces into a single tab character.
# you can see this text has 6 spaces in the front and back
# of the text.

$ xxd test.txt
0000000: 2020 2020 2020 5468 6973 2069 7320 736f        This is so
0000010: 6d65 2074 6578 742e 2020 2020 2020 0a0a  me text.      ..

# convert 3 spaces to a tab
$ unexpand -t 3 test.txt | xxd
0000000: 0909 5468 6973 2069 7320 736f 6d65 2074  ..This is some t
0000010: 6578 742e 0909 0a0a                      ext.....
fold, fmt
fold, and fmt are both text formatters that will help you keep text to a specific number of columns. fold is a bit more of a hammer then fmt is because it will hard wrap lines at the specified number of columns. By hard wrap I mean it will cut whole words (unless the -s flag is specified). fmt is more intelligent, and softer with your text. Not only does it wrap lines on whole words, but it also re-spaces the lines so they don’t have a ragged edge appearance.
$ cat test.txt
This is line 1, it is 41 characters long.
This is line 2, it's shorter.
Line 3.
This is another long line that will need to be wrapped.

# Notice the ragged edges, as the original newlines are kept
$ fold -s -w 20 test.txt
This is line 1, it
is 41 characters
long.
This is line 2,
it's shorter.
Line 3.
This is another
long line that will
need to be wrapped.

# This command ignores the original newlines and wraps the text nicely
$ fmt -w 20 test.txt
This is line 1,
it is 41 characters
long.  This is line
2, it's shorter.
Line 3.  This is
another long line
that will need to
be wrapped.
shuf
shuf is a handy tool that will produce random permutations of whatever input you give it.
# Play a shuffled mp3 playlist from the current directory
for i in "$(ls -1 *.mp3 | shuf)"; do echo "$i" | xargs -I{} mpg123 {}  ; done
tac
tac is cat spelled backward. And that is exactly what it does. Running this command will print the lines of a file in reverse order.
$ cat test.txt
This is line 1
This is line 2
This is line 3
This is line 4

$ tac test.txt
This is line 4
This is line 3
This is line 2
This is line 1
This has been just a small glimpse into what the coreutils has to offer! In part 2 I will present more useful, but mostly unknown commands that can be used to solve interesting problems. Did you know you can perform a prime number factorization from the command line with a single command? Read part 2 to find out how.
“Spared no expense”
2013-04-18
One of my favorite movies that I will watch any time it is playing is Jurassic Park. I don’t know what it is about that movie but every time I watch it I see or realize something new.
One of the characters, the billionaire founder of Jurassic Park John Hammond is always stating how he “spared no expense” while designing and building the park. Every aspect of the park was cutting edge, automated, and centrally controllable. All of this automation was provided by 8 networked Thinking Machine CM-5 supercomputers.
Now, while John Hammond’s boast might be true when it comes to the computer equipment, gourmet food, cars, and the DNA wet lab, he was actually quite cheap when it came to hiring trustworthy staff. In the end, this would prove to be his undoing.

In the famous line delivered by his developer Dennis Nedry:
I am totally unappreciated in my time. You can run this whole park from this room with minimal staff for up to 3 days. Do you think that type of automation is easy… or cheap? Do you know anyone who can network 8 connection machines and debug 2 million lines of code for what I bid for this job? Because if he can I’d like to see him try.
Dennis sums up a large and pervasive problem with how John Hammond deals with spending his money. He spends millions of dollars on super computers, and hires the lowest bidding, single developer to do a job that would take a team of five to get done right. At one point Hammond asks Nedry if he has “debugged the phones yet.” Why didn’t they use an off the shelf PBX system instead of writing their own? I have no idea!
So lets pretend for a moment that Nedry was disgruntled, but not a thief and would have just continued to finish out his contract at Jurassic Park. This still would have lead to the degradation, and eventual failure of the parks automated systems. Since Nedry was the only developer, there was no one else there to check his work or take over for any responsibilities. He was also under a tremendous time pressure to get the park open, which leads even the best developers to take shortcuts and just hack things together. In real dev work we call this “technical debt” because at some point you will pay the price for these bad decisions. Finally, once his contract was up he would have left on bad terms with Hammond, forcing Hammond to hire a new developer to continue Nedry’s work. The new developer would have to learn all of the code (over 2 million lines) and try to make fixes. More than likely the new developer would have discovered the immense technical debt that built up and have to re-write many parts of the system, which is a waste of time and money.
Although this was just a movie, I realized that this demonstrates an actual problem with the disconnect between stake holders (like John Hammond) and developers (like Dennis Nedry). I believe it is safe to assume that Hammond did not have a true grasp on the level of complexity of the system he was trying to implement. He is just a business man with a ground breaking idea, and a lot of money. Because of this he had no way of knowing what a bad bid for this development contract looked like. He may have had a few $800,000 - $1.1 million bids from teams of qualified developers, and saw Nedry at the bottom, who presumably had all of the necessary qualifications, with $150,000 and thought “well that’s a much better price to get this work done.” Instead he should have considered that it was a bad bid and no one would ever be able to do this work by themselves for so cheap.
Hammond does come to realize his mistake after the park systems go down. In a conversation in the cafeteria with Dr. Sattler he says that next time there will be less automation, and more people. Of course this is a knee jerk reaction to the immediate problem. The automation was not to blame, it was how he implemented the automation. He still does not have a grasp on real issues.
Of course I am ignoring the other pressures that were on Hammond in this analysis. It could be argued that he wanted minimal staff to keep maximum security and secrecy. But he still dropped that ball by hiring only one developer. Had he hired 3 developers to work on the project, Nedry would have had a hard time slipping his bad code into the system. The two other developers also would have been familiar enough with the system, and had the appropriate access levels to undo the Nedry hack.
So in conclusion, do I think Hammond was the “bad guy” in all of this, or that it was all his fault? No, Nedry ultimately decided to betray everyone and got himself and most of the staff of the Jurassic Park killed in the process. I am saying that Hammond should have invested more in his staff, and not just in the hardware. All the electric fences and automation in the world did not stop a fat man at a keyboard from tearing everything down.
“A busy month, a shiny new product!”
2013-04-03
This has been a hectic month at work! We are releasing several new products and unveiling them at NAB on April 8th. One of the products, the AdCaster is near and dear to my heart! I have been working on this for the last 3 months. My part was to create the C library to handle all SCTE-30 transactions.
So you might be wondering, what does this product do? Well it allows local broadcasters to inject (splice) local advertisements over the top of national advertisements. Have you ever been watching a cable channel like Comedy Central, and it goes to commercial and you see a split second of one ad, then it jumps to another ad? That was a local ad splice done by the local cable provider. This is how local businesses can get their commercials on channels like Fox or NBC. Of course you will only notice it when the splice point is slightly off, otherwise it is completely seamless.
So how does it all work? Actually that is the cool part (in my opinion). The national feed carries embedded markers in the multiplex (MPEG-2 transport stream). Those embedded markers are defined by SCTE-35.
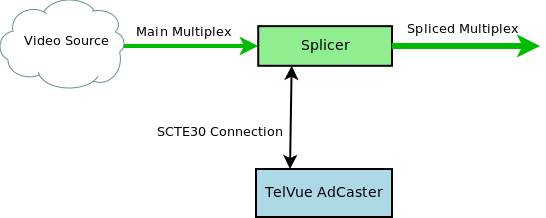
A splicer is listening for those embedded messages and when it finds one it sends a connected ad server (the AdCaster) a message over SCTE-30 that it is coming up on an ad that can be replaced. The AdCaster responds and begins sending the new advertisement video to replace the national advertisement feed.
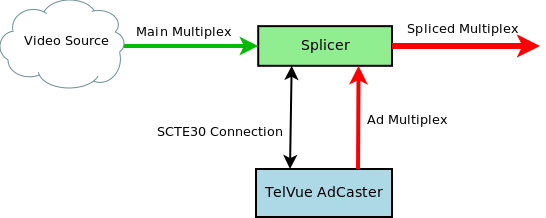
As long as the SCTE-35 markers are correct, and the two server are time-synced the downstream user should never even know a replacement was made. When the ad is complete the splicer returns to the national feed and the AdCaster logs a successful transaction.
Even though it was a scramble to get this ready for the 8th, I feel that we really have a great product here. We are still making tweaks and bug fixes to the ad delivery code and such but we have put our product through its paces and it’s ready for a production environment!
If you find yourself at NAB this year, please stop by the TelVue booth and check out a demo of the AdCaster in action.
“Updated examples for LJ Dart article”
2013-03-01
When I wrote the article for Linux Journal about Dart (back in December) I was using dart version 0.2.9.9_r16323, which at the time was the newest version. Now 3 months later when the article is published, the version of dart has advanced to version 0.4.0.0_r18915. This normally would not be an issue, but changes in the standard library (released Feb. 20th 2013) have broken the 3 month old example code provided in print. If that’s not bad timing I don’t know what is! Since I cannot update the print, I will instead give the updated example code here.
The first example, writing to a file, was affected by the addition of the IOSink class to the standard library and subsequent removal of the openOutputStream() method on the file class. To fix it I used the new File.OpenWrite() and IOSink.addString()methods.
   import 'dart:io';

   void main(){
     String fileName = './test.txt';
     File file = new File(fileName);

     var out = file.openWrite();
     out.addString("This is my first file output in Dart!\n");
     out.close();
   }
The wunder.dart example was by far the most impacted. The changes made to the streaming API, combined with the removal of the HttpClientConnection and InputStream classes, have made this program all but useless. It had to be re-written to support the new API. The HttpClient.getUrl() method now returns a Future<HttpClientRequest>. This future object returns a request object when it is done. That request object can be used to obtain the response object when it is closed. I was able to re-use the JSON code that I wrote in the previous example but I need to change how I imported the dart:json library.
   import 'dart:io';
   import 'dart:uri';
   import 'dart:async';
   import 'dart:json' as JSON;

   void main(){
     String apiKey = "";
     String zipcode = "";

     //Read the user supplied data form the options object
     try {
       apiKey = new Options().arguments[0];
       zipcode = new Options().arguments[1];
     } on RangeError {
       print("Please supply an API key and a zipcode!");
       print("dart wunder.dart <apiKey> <zipCode>");
       exit(1);
     }

     //Build the URI we are going to request data from
     Uri uri = new Uri("http://api.wunderground.com/"
         "api/${apiKey}/conditions/q/${zipcode}.json");

     HttpClient client = new HttpClient();
     client.getUrl(uri).then((request) {
       var response = request.close();
       response.then((response) => handleResponse(response));
     },
     onError: (AsyncError e) {
       print(e);
       exit(3);
     });

     client.close();
   }

   void handleResponse(HttpClientResponse response){
     List jsonData = [];
     response.toList().then((list) {
       jsonData.addAll(list.first);

       //response and print the location and temp.
       try {
         Map jsonDocument = JSON.parse(new String.fromCharCodes(jsonData));
         if (jsonDocument["response"].containsKey("error")){
           throw jsonDocument["response"]["error"]["description"];
         }
         String temp = jsonDocument["current_observation"]
            ["temperature_string"];
         String location = jsonDocument["current_observation"]
            ["display_location"]["full"];

         print('The temperature for $location is $temp');
       } catch(e) {
         print("Error: $e");
         exit(2);
       }
     },
     onError: (AsyncError e){
       print(e);
       exit(4);
     });
   }
This version will work just like the old one, but for some reason it hangs if you use the wrong Wunderground API key. I am not sure why, but I am working on a better version of this using the HttpClientResponse.listen() method. I will post that when I have something working but for now this will do.
The fingerpaint.dart example wasn’t too badly affected. Dart has change the semantics of how it deals with events. Now it uses the Stream class to make event streams that you “listen” to. So instead of registering with an event like _canvas.on.mouseDown.add((Event e) => _onMouseDown()); you would add a listener to the event stream _canvas.onMouseDown.listen((Event e) => _onMouseDown());.
Here is the new example code that will work with the newest Dartium.
   library fingerpaint;

   import 'dart:html';

   class DrawSurface {
     String _color = "black";
     int _lineThickness = 1;
     CanvasElement _canvas;
     bool _drawing = false;
     var _context;

     DrawSurface(CanvasElement canvas) {
       _canvas = canvas;
       _context = _canvas.context2d;
       _canvas.onMouseDown.listen((Event e) => _onMouseDown(e));
       _canvas.onMouseUp.listen((Event e) => _onMouseUp(e));
       _canvas.onMouseMove.listen((Event e) => _onMouseMove(e));
       _canvas.onMouseOut.listen((Event e) => _onMouseUp(e));
     }

     set lineThickness(int lineThickness) {
       _lineThickness = lineThickness;
       _context.lineWidth = _lineThickness;
     }

     set color(String color) {
       _color = color;
       _context.fillStyle = _color;
       _context.strokeStyle = _color;
     }

     int get lineThickness => _lineThickness;

     int get color => _color;

     void incrementLineThickness(int amount){
       _lineThickness += amount;
       _context.lineWidth = _lineThickness;
     }

     String getPNGImageUrl() {
       return _canvas.toDataUrl('image/png', 1.0);
     }

     _onMouseDown(Event e){
       _context.beginPath();
       _context.moveTo(e.offsetX, e.offsetY);
       _drawing = true;
     }

     _onMouseUp(Event e){
       _context.closePath();
       _drawing = false;
     }

     _onMouseMove(Event e){
       if (_drawing == true){
         _drawOnCanvas(e.offsetX, e.offsetY);
       }
     }

     _drawOnCanvas(int x, int y){
       _context.lineTo(x, y);
       _context.stroke();
     }

   }

   void main() {
     CanvasElement canvas = query("#draw-surface");
     DrawSurface ds = new DrawSurface(canvas);

     List buttons = queryAll("#colors input");
     for (Element e in buttons){
       e.onClick.listen((Event eve) {
         ds.color = e.id;
       });
     }

     var sizeDisplay = query("#currentsize");
     sizeDisplay.text = ds.lineThickness.toString();

     query("#sizeup").onClick.listen((Event e) {
       ds.incrementLineThickness(1);
       sizeDisplay.text = ds.lineThickness.toString();
     });

     query("#sizedown").onClick.listen((Event e) {
       ds.incrementLineThickness(-1);
       sizeDisplay.text = ds.lineThickness.toString();
     });

     query("#save").onClick.listen((Event e) {
       String url = ds.getPNGImageUrl();
       window.open(url, "save");
     });
   }
The fingerpaint webapp is affected by another breaking change as well. Google will no longer host the dart.js bootstrap file. Now you must use the pubprogram that comes with Dart. Pub is the dart package manager and uses YAML files for web application configuration. You must create a file called “pubspec.yaml” in the same directory as your project that contains the following:
   name: fingerpaint
   dependencies:
      browser: any
Once that has been created you run the command:
   $ pub install
   Resolving dependencies...
   Dependencies installed!
Now you will have a new directory called packages. Remember that really long link to the Dart bootstrap file? Well, now you need to change that link from:
<script src="http://dart.googlecode.com/svn/trunk/dart/client/dart.js"></script>
to:
<script src="packages/browser/dart.js"></script>
Now you should have no problems running this code through Dartium.
While it is embarrassing to have my first Linux Journal article meet the world DOA, I have learned a great deal from this experience! First, always include what version of whatever application or language you are using in the article. Had I simply mentioned that I used Dart 0.2.9.9 this whole situation would have gone better. Second, maybe I should wait until a project is a bit more mature before giving it a full write up. I am not upset about this situation, and I am glad Dart is moving forward so rapidly with development! I am just a bit angry at the timing of it all. Oh well, just some bad luck! The guys and girls at Linux Journal were very understanding and made this whole situation go smoother. If you are a Linux Journal reader I hope you will understand as well. This is the price we must sometimes pay for bleeding edge technology.
“Going with the underdog”
2013-03-01
For a few years I have been using VPS link as the virtual machine host for my website. They were great, but nothing has changed with them in a few years and the VPS specs started to get a bit stale. I had a single core, 256 MB of ram, 10 Gigs of storage, and a static IP with 300 Gigs of data. That was enough to run my simple site, but I felt that $19.95 a month was too much for such a simple platform.
A friend at work sent out an email about a new player in town called digital ocean. For only $5 a month I get more virtual machine. 1 core, 512 MB of ram (2X as much) 20 Gigs of storage (again 2X as much) and a static IP with 1TB of data (3X as much). They also use SSD hard drives so the overall speed of the machine is faster.
Overall I have had no issues with the transfer, setting up the machine was super easy! I just created an account, and selected which tier and disk image I wanted and in about 30 seconds I had a Linux server ready to be used. Installing my software and website was easy too (mostly because I have the entire process scripted). I had the site up and online in about 15 min. Then I updated my A record, let it run for a few days and canceled my old VPS subscription. All-in-all it was a great experience.
Obviously my site is small and I get a limited amount of traffic, so I can take a chance on the new guy. I recommend this host to anyone who feels they are paying too much and getting too little. Don’t get me wrong, I did like VPS link and never had an issue with their service or support. I just can’t justify paying more and getting less.
“To goto or not to goto”
2013-01-30
When ever I get into a discussion about C with other developers I inevitably get asked “You don’t use goto statements do you?” For years I would answer “of course not! That’s bad practice!” Without really thinking of whether this answer was correct. Recently I have been realizing that it might simply not be the case.
Now don’t get me wrong, a goto is a tool that is very easy to misuse and abuse, and that is not what I am advocating at all! I am simply pointing out that there are times when using a goto in C provides a cleaner and easier to follow solution then any alternative.
C has no separate error handing code like C++ or Java. There is no try-catch or any other error specific statements. What C does have is goto. C allows you to give any line of code a name and jump to that line from anywhere in the same function. It acts as a one-way transfer of control. For error conditions, this can provide an excellent method to jump to some generic error handling code in your function (usually main()).
#include <stdio.h>
#include <stdlib.h>
#include <errno.h>
#include <string.h>

int main(int argc, char* argv[]){
   FILE *file = fopen(argv[1], "r");
   if (!file){
      goto error;
   }

   //Do something with the file here...

   fclose(file);
   return EXIT_SUCCESS;

error:
   fprintf(stderr, "An error occurred! %d (%s)\n", errno, strerror(errno));
   return errno;
}
In this example we try to open a file that is given as an argument to the program. If that file does not exist, or it cannot be opened for some reason we will jump to the error block. If the file is opened without any issue the program will continue on and exit normally. In this instance we are using the goto like a catch block.
$ ./test hello.txt
An error occurred! 2 (No such file or directory)
The overall lesson here is that goto blocks are not as evil as they are made out to be by modern programmers. There is a time and place for them, like any other tool. Just as you wouldn’t hang tile with a hammer and nails, you shouldn’t use goto statements for looping or general flow control.
“A Practical review of Practical Vim”
2013-01-13
I have finished my first read through of Practical Vim by Drew Neil and my first impression is WOW! I didn’t realize what a Vim beginner I was until I read this book. The book is organized into 121 tips, grouped by category. The book presumes knowledge of Vim’s basic commands, but nothing more. It starts you on your Vim adventure by “Introducing” the dot (redo) command. He doesn’t just show that it repeats the last change, he show how to edit your document to maximize the use of the dot command to automate repetitive tasks.
Part 1 goes though all of the Vim modes. For anyone more familiar with a WYSIWYG editor like Microsoft Word or Open Office, the idea of modes can be confusing. Drew makes a great analogy to a painter painting a picture. A painter does not rest with his brush on the canvas, he only touches the canvas when he wants to make a change. This is like Vim’s normal and insert mode. Normal mode is used for resting, and moving around the document, Insert mode is for making changes. He continues on to cover the normal, insert, visual, and command-line modes in detail, giving great tips to squeeze every bit of power out of them.
Part 2 goes through managing files and buffers. Vim does not allow direct edits to a file, it first loads the file data into a buffer and you modify the buffer. Then if you are happy with the results you can write the buffer out to the file. Drew provides tips for managing multiple files and buffers, splitting the workspace into multiple windows, and saving files as the super user.
Part 3 covers advanced methods of moving around within the document. Tip number 51 was especially useful for me since most of my text editing tasks are done in various source code. Tip 51 shows how to quickly select text between different kinds of brackets. This section continues to show the best ways to move between files with jumps. This is a very common task when programming. Especially if you are trying to jump from some code that is using a function to where a function is defined. Drew shows how to use global markers to allow easy jumping.
Part 4 bring us into registers in Vim. Registers are used for a verity of tasks. They can hold text, or store macros. Drew shows us how to make the most of registers. Macros are especially useful for automating repetitive multi-keystroke tasks that would other wise be very time consuming.
Part 5 is a huge section that covers all of the searching, sorting, and substitution commands that Vim has to offer. Drew talks about the difference between how Vim handles regular expressions, and what users might be used to with other tools. He also shows the power of the “very magic” flag (I love that name). This section is one that I will be reading again and again for the foreseeable future.
Drew wraps up the book with Part 6. Part 6 covers the extra tools and goodies that take Vim from a great editor, to an amazing editor. For programming, ctags is an indispensable tool! Drew shows how to set up ctags to work with Vim. He also dives into using auto completion, which can be used for programming as well as writing documents where you may have a word that you have used previously but might not recall the spelling later in the document. Drew finishes this section by going through the Vim spell checker. Those who know me personally know that I can’t spell to save my life! The Vim spell check is very powerful and can decipher my most egregious spelling mistakes. It usually can guess my intention in the first 3 choices.
This book was a fantastic eye opener! I highly recommend reading it if like me you have chosen to make Vim your one and only editor. You will most likely have to read it through a few times and execute the commands to commit them to memory. I have already found myself in the situation where I remember there was a tip for my exact problem, but I can’t remember the steps and needed to look it up. Thats okay though since this book does make for an excellent desk reference because of it’s “tip” based organization. Check out this book at the Pragmatic Programmer website, and check out Vimcasts where dozens of excellent videos and tutorials for Vim are posted for free!
“A great way to start the year”
2013-01-10
Exciting news everyone! Linux Journal has accepted my article about Google Dart to be published in their March 2013 issue. Although nothing is 100% until the issue layout has been created, I’m sure that my article will make it in. Since I received this news I have hidden my blog posts about Dart, and will reactivate them once the article has been released. Sometime after march I will continue with the dart series that I started in December. In the mean time I will continue to post about new books and projects. Don’t forget to grab your copy of Linux Journal when it comes out in March!
“Up and Coming”
2012-12-20
I just wanted to post a quick update about what is coming up, and what I have been working on. Obviously part 4 of the “A Bit of Dart” series is on its way! I have been side tracked a bit because Linux Journal said they are interested in an article about Dart written by yours truly! So needless to say that takes priority for the moment. That’s not the only project on my plate at the moment. I have been working with statsd, an awesome network daemon by the team at etsy that takes statistical data via UDP packets and sends them to a statistics back end service. I will be writing about that, and posting some sweet new C code showing it off in the new year. I have also been reading a great book called “Practical Vim” by Drew Neil. So far it is an amazing book that has brought my vim-fu to a whole new level. I will be writing a full review of that when I have finished it. Keep checking back, there are more exciting projects and tutorials on their way.
“Resurrecting the Dead Commit”
2012-11-30
While working on an important project at work, I finally got a huge problem solved and was in a good place to commit my changes. I had 6 files that I had changed at various times over 10 days while trying to get over this hurdle. Not every change was directly related to the problem, so I started to add the files and commit them in groups so they would be easier to track.
git add firstfile.c
git commit -a -m "my comment that is only supposed to be for this one file."
Thats right, I foolishly fat-fingered the -a in the commit line, committing all of the changes for all 6 files under the wrong commit message. Now this is not the end of the world. I had not pushed this commit to github so no harm no foul. I could just roll back head and try again.
git reset --hard HEAD^
Oh crap! Almost as soon as I hit the enter key I realized that I had once again screwed up! What can I say - it was getting late and I was getting punchy. Either way I had just lost days worth of modifications including the solution to the problem that plagued my project for so long. Had I just left off that --hard it would have been okay! However git has my back! Git never really deletes or forgets a commit.
git reflog
This will show a list of all commits along with their sha signatures and comments. We can restore to a lost commit by checking it out to its own branch. Assuming that our lost commit has the signature ab12345 we can use the command:
git checkout -b branch_with_fix ab12345
Now I had a branch with all of those changes restored. I quickly pushed this branch to github so I would not lose them again. Then I copied those 6 files to temporary location, checked out master and copied the files back. I was now in the same place as before the botched commit! This time around I took my time and committed the files properly.
Recently I have been looking into Opus, a really awesome audio codec that is optimized for well… everything. It’s good for streaming audio, and storage audio. It can handle high bitrate music, and low bitrate mono voice recordings. The streaming optimizations make it very robust against packet loss which is a huge plus for live audio content. You can find the full specification for the codec in RFC-6716
To install it on ubuntu 12.04, you will need to install it from source.
To compile any software in Ubuntu you must have build-essential installed. You can install that with the apt-get command.
sudo apt-get install build-essential
If you haven’t done so already grab a copy of opus-1.0.1. Extract the files, configure, make, and make install.
tar -zxvf opus-1.0.1.tar.gz
cd opus-1.0.1
./configure --prefix=/usr
make
sudo make install
If you run into trouble check out the README document.
One you have libopus installed, you will want to install opus-tools to use the reference encoder and decoder provided. However to do this requires that libogg be updated since Ogg is the container of choice for Opus audio. The default version of libogg that ships with Ubuntu is 1.2.2. opus-tools requires version 1.3 or greater. To start grab a fresh copy of libogg-1.3. I already had a copy of libogg-1.2.2 installed and I want to replace it with libogg-1.3. Ubuntu has a strange layout for libraries, so to do that I will install libogg-1.3 like “normal” then copy the new .so file to /usr/lib/x86_64-linux-gnu directory and run ldconfig. This will keep the old library just in case, but update the references to libogg to use the new library.
tar -zxvf libogg-1.3.tar.gz
cd libogg-1.3
./configure --prefix=/usr
make
sudo make install
cd /usr/lib
cp libogg.so.0.8.0 x86_64-linux-gnu/
sudo ldconfig
Now you should see two versions of libogg (if you already had the default one installed), and libogg.so.0 should point to the newer one.
lrwxrwxrwx 1 root root 15 Nov 26 18:27 libogg.so.0 -> libogg.so.0.8.0
-rwxr-xr-x 1 root root 65971 Nov 26 18:27 libogg.so.0.8.0
-rw-r--r-- 1 root root 26776 Aug 12 2011 libogg.so.0.7.1
-rw-r--r-- 1 root root 26816 Aug 12 2011 libogg.a
lrwxrwxrwx 1 root root 15 Aug 12 2011 libogg.so -> libogg.so.0.7.1
Note: If you didn’t already have a copy of libogg installed, you can skip the last 3 steps in the above instructions.
Now it is possible to compile and install opus-tools. Grab a copy of opus-tools if you haven’t done so already. Then its the usual extract, configure, make, and make install.
tar -zxvf opus-tools-0.1.5.tar.gz
cd opus-tools-0.1.5
./configure
make
sudo make install
Now you should have 3 new tools. opusenc, opusdec, and opusinfo. opusenc is used to encode a wav or raw PCM file into an opus file. opusdec will decode an opus file and either play it out, or you can write the decoded data to a file. opusinfo will tell you about an opus file. I was shocked at sound quality this codec could produce with a low bitrate. I converted a 128Kbps mp3 file to a 48Kbps opus file and could hardly tell the difference.
mpg123 -s "06 - Me And You.mp3" | opusenc --bitrate=48 --raw - "Me and You.opus"
To play this out in ubuntu (which uses pulse audio) you need to use pacat
opusdec “Me and You.opus” - | pacat
Of course converting from an MP3 already leaves you with a lossy source. I recommend converting some native flac files for a better test as flac is a lossless codec. Check out some different bitrates and hear the difference for yourself!
“Skyfall”
2012-11-25
I just got back from the movies where my wife and I saw the new James Bond movie. Don’t worry, there won’t be any spoilers! Overall I really enjoyed the movie! I thought it was well filmed, the dialogue was good and the scenery was beautiful (Especially the Shanghai shots). The only problem I had with the movie (and it’s not the only movie to commit this crime) is the use of incoherent nonsense computer speak. “We are tracing his encryption signal.” Tracing his encryption signal? Is that the best you could do? With the limitless numbers of computer security consultants you could not find one to look over the script and pen in some legitimate tech speak? Now don’t get me wrong, I’m all about suspension of disbelief. One of my favorite movies is Swordfish which is full of unintelligible techno-babble. But that is a “hacking” move; Skyfall is an action movie with some computers in it. Just spend some money and get it right! The average person in the audience won’t be able to tell the difference anyway, but at least I won’t cringe and write a blog post about it!
“jamesslocum.com is online!”
2012-11-22
After a year of “under construction” status on my website, I finally decided to sit down and write a new page. Web development has always been interesting to me, but not my strongest skill by a long shot! I have no eye for design, and I find JavaScript to be a mess, however server side programming comes easy to me. So to begin I had to choose a web stack. In college I would have gone with Apache and Tomcat since back then I was Java programmer, but I only have 256 Mb of ram to work with on my VPS so those are too bloated for my simple needs. I settled on Sinatra and Thin. I was leery at first when it came to Thin, but after some research I found that it would be the best fit. It’s small (memory wise), fast, and easy to configure. Sinatra is a great Ruby web DSL that makes building dynamic web applications as easy as writing a script. I used Sinatra routes to handle the requests and generate the dynamic data and hand it off to the views. For the views I decided to use erb files as they reminded me of my old days of writing jsp files and lowered the learning curve.
Now that I had the web stack in place, I was back to my initial problem of not being a very good front end designer. Twitter bootstrap to the rescue! Twitter bootstrap is an awesome collection of css and JavaScript files that make front end development super easy. I read their documentation and looked at some of their samples, and developed what I think is a nice site. As of this post you should be able to see the new site up and running. What is really amazing about this is how quickly I was able to get this from scratch to on-line! Only 2 days of development time! The whole process was such a breeze and I have the different technologies I chose to work with to thank for that!
Check out some of these projects for yourself!
Sinatra - http://www.sinatrarb.com/
Thin - http://code.macournoyer.com/thin/
Twitter Bootstrap - http://twitter.github.com/bootstrap/index.html
“It's pronounced "fork bomb"”
2012-11-20
For those of you uninitiated in the world of bash, the default shell on Ubuntu Linux, you might be wondering why I decided to name my blog as a sequence of seemingly random characters. The truth is that those seemingly random characters can cause a mess of trouble if entered on the command line of a bash shell prompt. They are actually a small program called a fork bomb. When run it recursively spawns 2 new processes, which in turn spawn 2 more new processes, until the system grinds to a halt because all of the process id’s have been consumed. Of course adding an nproc limit to /etc/security/limits.conf will solve this issue, but I digress. The reason for the name is to set the overall tone for the kinds of posts I will be making. Mostly this will be a development blog concerning different projects I am working on, or problems that I am trying to solve. Sometimes it will just be random ideas, thoughts and experiences. I don’t really have an intended audience, or mission for this blog, but if you stumble upon it I hope you glean some wisdom.